Snowflake Apple Pie Pops

Happy Thanksgiving!! I hope that your day is mapped out already with delicious foods from the comfort of your own home. As mentioned in my previous post, apples and Fall are synonymous to me. I’m sure most, if not all of those reading this definitely expect an apple pie featured at their Thanksgiving dessert table. Being an apple pie amongst all those other delicious treats like pecan pie, sweet potato pie, cheesecake and everything else makes it hard to stand out. I thought that it was time for the traditional apple pie to get the upgrade it deserved. Of course I dare not disrupt the authenticity that is the apple pie filling, but what about serving it another way.

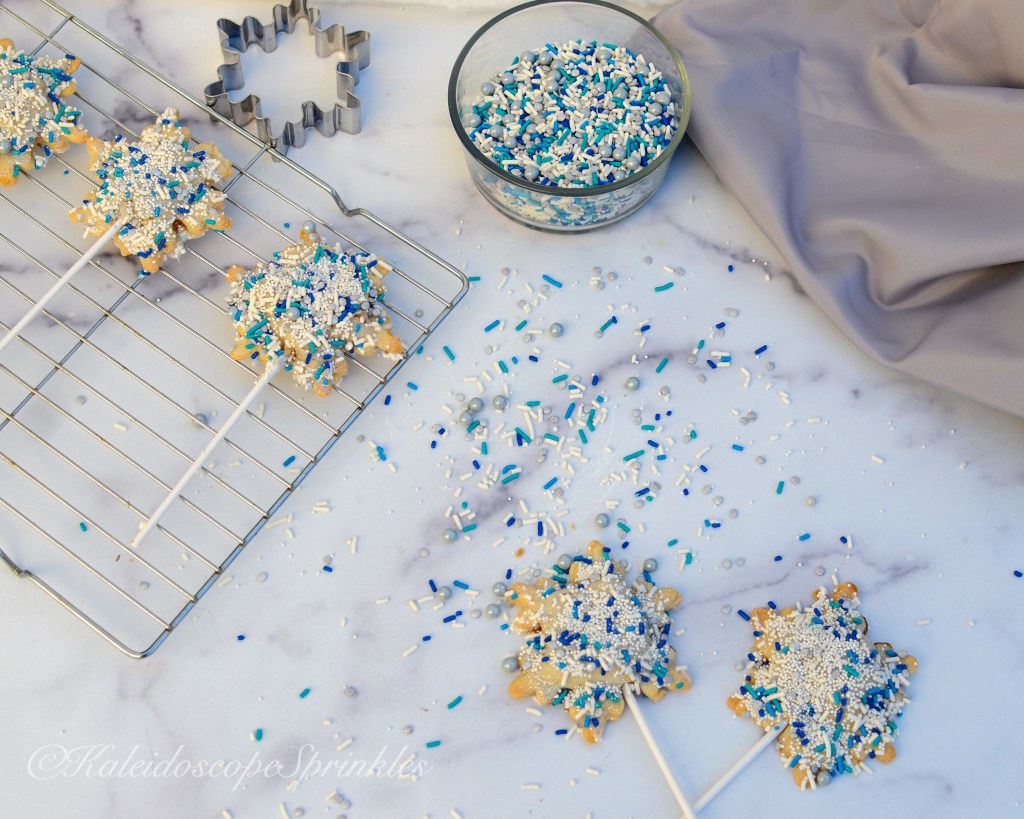
I got the idea to make apple pie pops after I realized that every dessert on a stick somehow captures an audience. The weather has changed and snow is somewhere on the horizon, just not here in Southern California. Since I have no chance of seeing these unique miracles of ice I thought to create my own. These treats provide the comfort of a frosty snowflake on the outside with the warmth of a delicious apple pie on the inside. This recipe is easy to make and follow, so it’s great to make with kids.

Give the recipe below a try and I guarantee satisfaction!

Step by step video

Ingredients

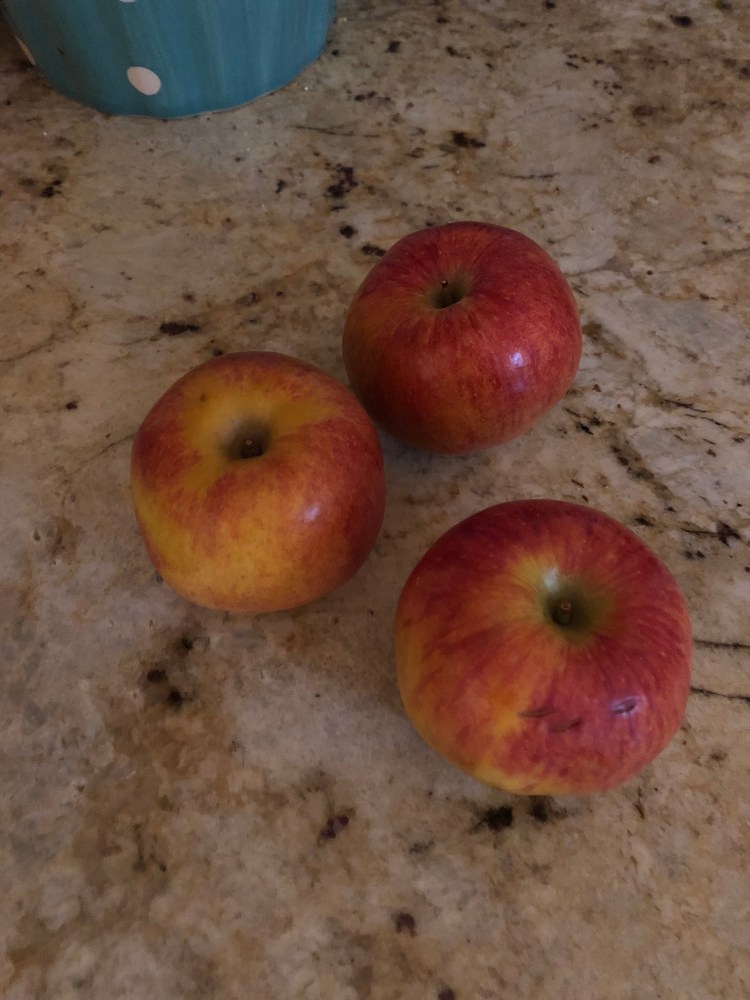
4 cups of Granny Smith apples, pealed and finely chopped

Juice of lemon (approximately 2 tbsp.)

½ cup brown sugar

1 tbsp. flour

1 tsp. cinnamon

¼ tsp. ground ginger

¼ tsp. salt

I was short on time so I used pre made pie crust. Check out my recipe for homemade pie crust here.

Glaze

2 cups confections sugar

3-4 tbsp. milk

1 tsp. vanilla extract

Directions

If using homemade crust, make crust first and allow to chill in the refrigerator.

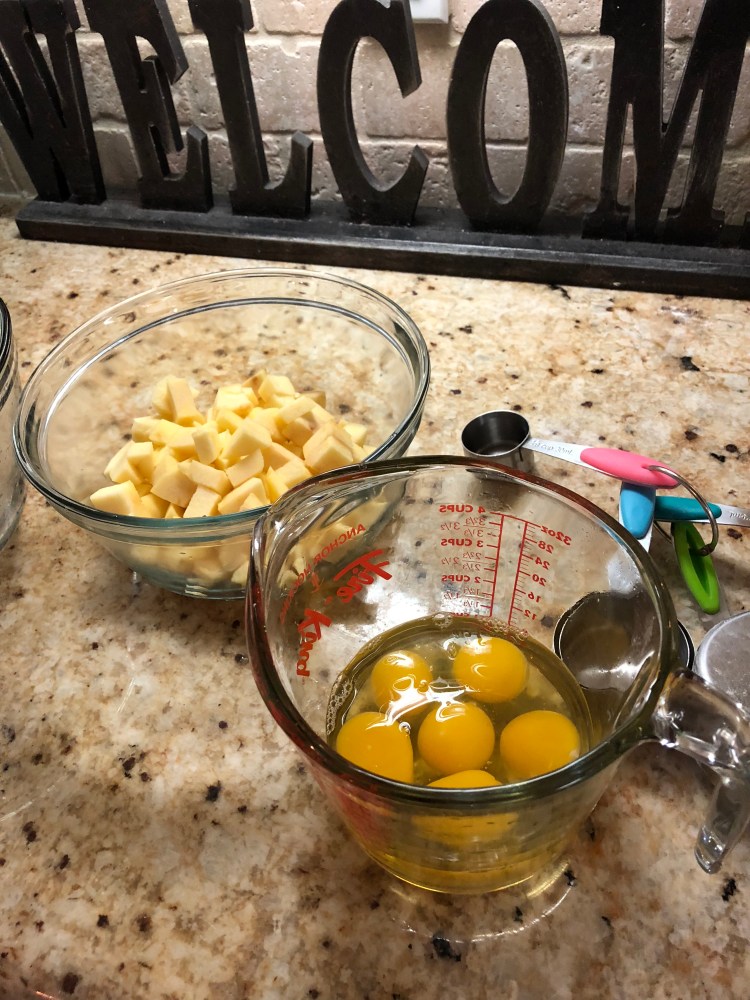
While dough is chilling, In a large bowl add chopped apples, juice of lemon, brown sugar, flour, cinnamon, ginger and salt. Mix all ingredients together until combined and apples are coated in mixture.

Using a large saucepan, cook apple mixture on low-medium heat. Continue to cook down apple filling for 5-10 minutes until liquid is dissolved and coats the back of the spoon. Once apple filling has thickened, take the filling off the heat and allow it cool completely to room temperature. 

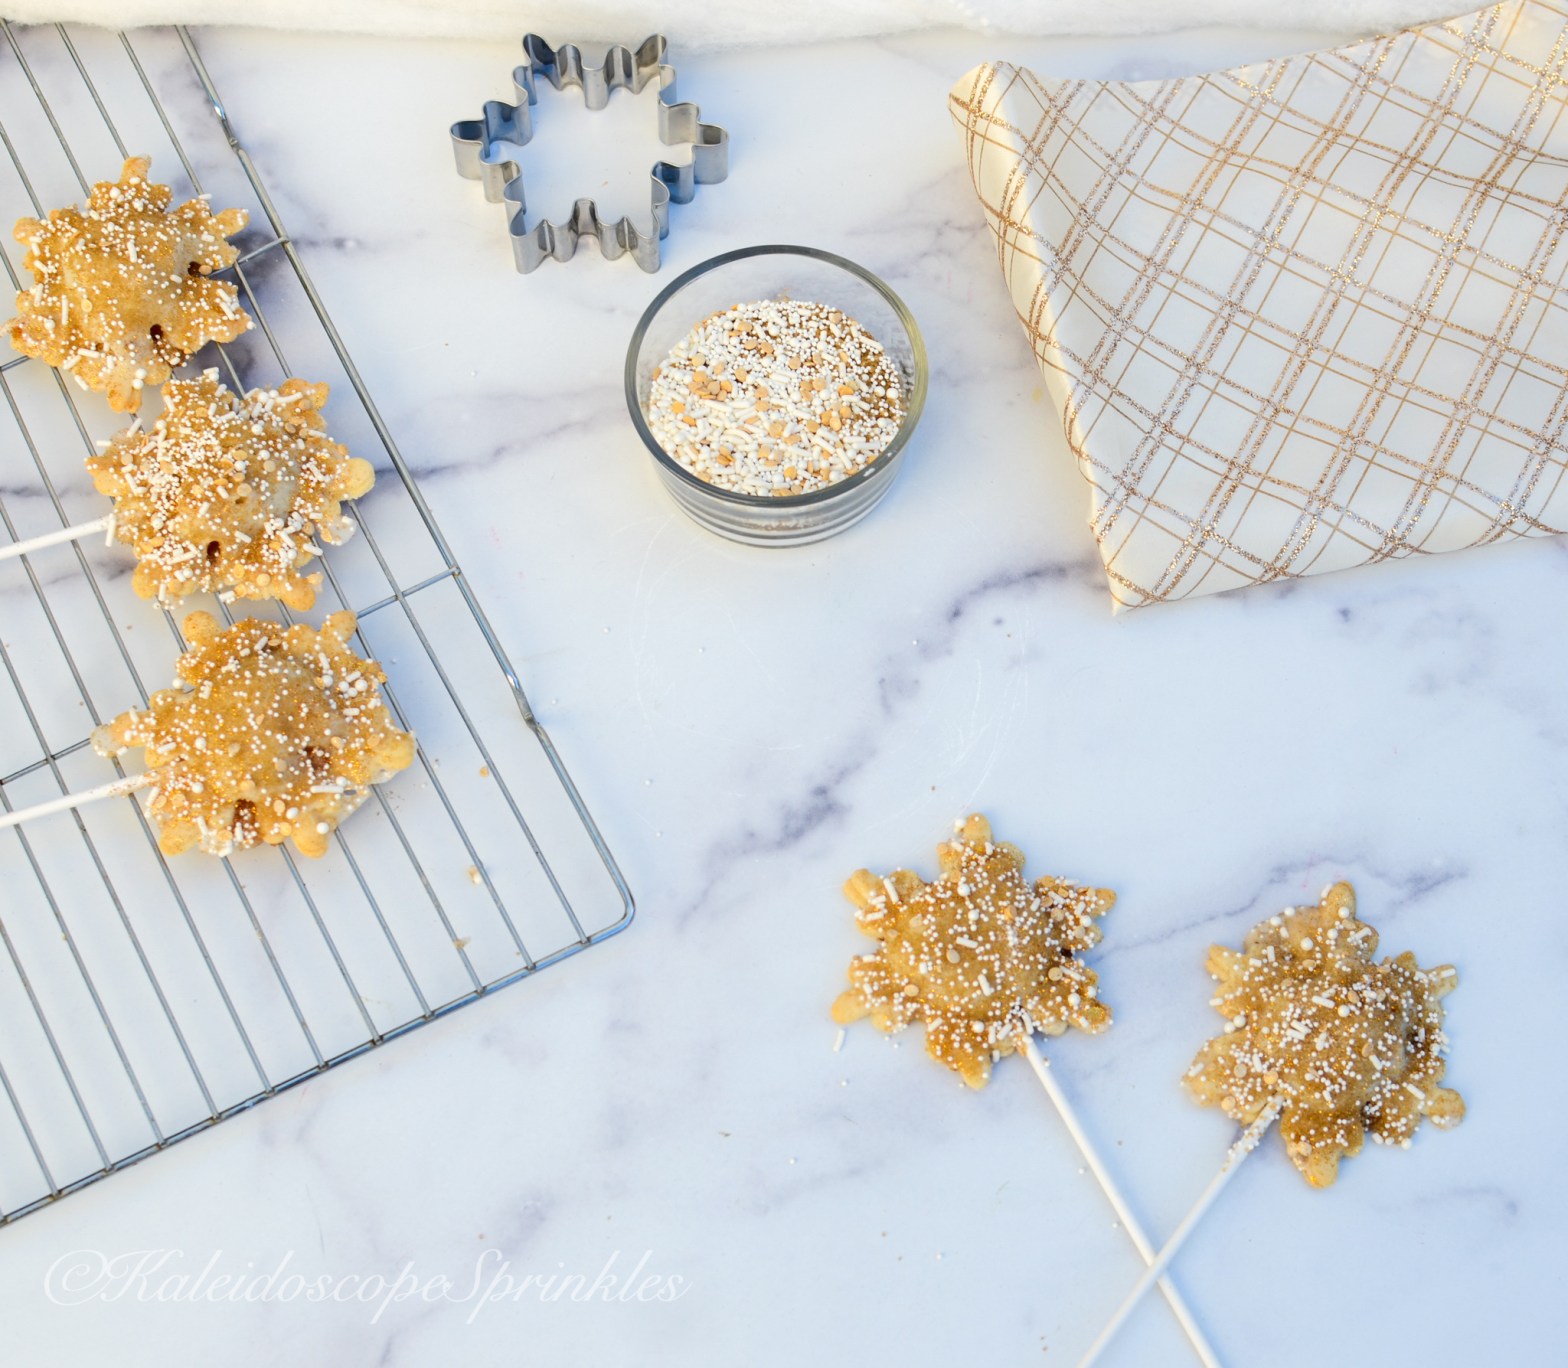
Preheat oven to 350F. Take dough out of the refrigerator. Let the dough rest for at least 20 minutes. Divide dough in half. Roll first half of dough out into a 10″ diameter circle about 1/8″ thick. Using cookie cutter, cut out snowflake shapes and place on parchment paper lined cookie sheet. Place treat sticks in the middle of snowflakes. Place about a teaspoon of filling in the middle of each snowflake. (Be careful not to use too much filling or you may not be able to seal up your pie pops.) Roll out the second half of dough, cut out same amount of snowflakes and gently place them on top of the apple filling. Seal up edges of pie dough. Bake pie pops for approximately 12- 15 minutes until crust is golden. Allow pops to cool. 

While pops are baking make glaze. Using a small bowl whisk together confectioners sugar, milk and vanilla extract until smooth.

Covered cooled pie pops with glaze and decorate with sprinkles (optional).

Devour and enjoy!

Apple Cider Donut Bread Pudding with Salted Caramel Glaze

Apples, Apples, Apples! This glorious fruit has always been a big part of Fall to me. As a child growing up in Sacramento, it was a yearly tradition to take a trek to Apple Hill every Autumn. Apple Hill is this amazing once secluded place about an hour outside the capital city that is filled with different apple farms. I remember getting car sick only to then later stuff myself with fresh apple cider and plenty of donuts from these fantastic orchards. We would frolic through the trees and pick our own apples for the fun and calorie burn. When we arrived back home, I would then help my mom either make pies or something else satisfying with the apples we just picked.

Last year while I was doing my typical pumpkin hall at Trader Joes I discovered these donuts. Since my eyes are always bigger than my stomach I decided to buy two packs of these delicious treats. I ate a few of these delicately soft but perfectly spiced confections and was quite satisfied. Needless to say I was not able to finish all the donuts I had purchased. I was not going to throw away perfectly good donuts, so I left them on the counter and pondered what to do.

This new take on bread pudding is what I came up. If you didn’t already know I consider myself a bread pudding connoisseur. Growing up with a family with Louisiana roots and my years living in New Orleans has made me an expert. Bread pudding is also my absolute favorite dessert if made correctly. I made this fantastic bread pudding last season and served it to my family when they came to visit me here in Los Angeles. This recipe was definitely a hit! The great thing about bread pudding is you can eat it for dessert and then reheat for breakfast the next morning. It’s perfect for Thanksgiving because of this purpose, so I decided to share the recipe with you below. I hope you give this a try for your small, safe holiday gathering this season!

Ingredients

Pudding

8 cups of roughly chopped day old apple cider donuts (approximately 9-10 donuts)

2 cups of apples, peeled and diced (I used Honeycrisp)

1 cup of brown sugar

3 cups of milk

1 cup of heavy cream

6 large eggs, room temperature

2 tsp of cinnamon

2 tbsp of butter

Glaze

1 ½ cups of sugar

1 cup of heavy cream

½ cup milk

½ cup (1 stick) of butter

1 tsp. of vanilla extract

1 tsp. of kosher or sea salt

Directions

Preheat oven to 325 degrees. In a large bowl, whisk together brown sugar, cream and milk until sugar has dissolved. Add eggs one at a time. Stir until combined. Stir in cinnamon. Add donuts to custard mixture, making sure that all the donuts are covered by the custard. Allows donuts to soak for at least 15 minutes until softened. Fold in diced apples. Place pudding in a buttered 9 x 13 x 2 pan or large casserole dish. Place casserole dish in water bath or Bain Marie. Bake for approximately one hour until firm.

While pudding is baking make the glaze.

To make the caramel, place 1/2 cup of the sugar in a heavy or cast iron skillet set over medium-high heat and cook, stirring constantly, until caramelized. In a large saucepan, combine the remaining cup of sugar with the heavy cream and bring to a boil. Add the caramelized sugar to the boiling milk mixture and cook, stirring constantly, to a soft-ball stage (234 to 240ºF on a candy thermometer). Remove saucepan from the heat, add the milk, butter, vanilla and salt. Stir until smooth. Allow caramel to cool completely to room temperature.

Once pudding is done, allow is to cool to room temperature. Poor glaze on top.

Devour and Enjoy!!

Delicious bread pudding!

National Chocolate Day/ Happy Halloween!

Happy Saturday and Halloween! It has been a busy week indeed. On Wednesday I was celebrating National Chocolate Day, which everyone should partake of. I decided that I wanted make my own chocolates this year since I knew I wouldn’t be buying any to pass out to trick or treaters. I thought this would be a great way to celebrate and show how easy it is to make your own treats as well. If chocolates weren’t enough, I added a delicious chocolate cake to this recipe to make also. There is no such thing as too much chocolate especially when you are celebrating a national holiday times two. If you are not sure what your plans are for today and you want something rich and delectable to eat that’s sweet. Give this recipe a try. Check out the details for the recipe and the DIY step-by-step video below

(For this recipe the caramel, chocolate cake and frosting have been pre-made)

Music Dark Mind- Jeanine

For chocolate cake and frosting see my post: National Chocolate Cupcake Day

For caramel see my post: Sweet Serendipity Bakery’s Famous Caramel Sauce

Salted Pumpkin Spice Caramel

½ cup caramel

½ cup pumpkin puree

2 tbsp. heavy cream

½ tsp. kosher salt

½ tsp. pumpkin pie spice

Chocolates

2- 10oz. bags of chocolate (your choice, I used dark and white chocolate)

Cosmic Shimmers, for decorating (optional)

The Shade Sprinkle Mix, for decorating (optional)

Fall Through Sprinkle Mix, for decorating (optional)

Directions

Make pumpkin spice caramel by heating up pre-made caramel using double boiler or microwave. Stir in heavy cream, pumpkin puree, salt and pumpkin pie spice. Stir until smooth and combined. Place pumpkin caramel in the refrigerator to set and chill for at least 2 hours or overnight.

While caramel is chilling prepare and frost chocolate cake. Place cake in the refrigerator to allow frosting to set.

Once caramel has cooled, make chocolates by melting chocolate. You can use a double boiler or microwave to melt chocolate. Place melted chocolate in the molds and fill with pumpkin caramel. Place chocolates in the refrigerator to allow them to set for at least 30 minutes.

Once cake and chocolates have set, remove them from the refrigerator and decorate. Use Cosmic Shimmers on chocolates for a nice shine and sparkle. Decorate cake with Sprinkle Mixes for a fabulous, impressive decoration.

Devour and Enjoy!

Finished Chocolates on Chocolate Cake

National Chocolate Cupcake Day!

Happy Sunday and National Chocolate Cupcake Day! I’m not sure who decided to make up these official food holidays but my tastebuds appreciate every bit of it. I’m so glad this holiday takes place during my favorite season. I thought that this was the best time to perfect my chocolate cupcake recipe and decorate with Fall decorations to my hearts content. I got my hands on some edible leaves. I, of course, also used the Fall Sprinkle Mix pack and Cosmic Shimmers from my company Kaleidoscope Sprinkles and got to work.

Below you can find my chocolate cupcake recipe and video on how I decorated these delicious delectables.


Here is the link to the Fall Sprinkle Mix pack used to decorate my cupcakes
.


Here is the link to the Cosmic Shimmers (edible glitter) used to decorate my cupcakes.

Music: Chocolate High- India Arie (feat. Musiq Soulchild)

Recipe Below
(Makes 12 cupcakes)

Ingredients
½ cup (1 stick) of butter, softened

1 cup granulated sugar

2 large eggs

1 tsp. of vanilla extract

1 cup of all purpose flour

3/8 cup (6 tbsp.) cocoa powder

¾ tsp. baking powder

1/8 tsp. of salt

½ cup of buttermilk

¼ cup old coffee, reheated


Italian Meringue Buttercream Frosting
3/4 cup of granulated sugar

2 tbsp. of water

3 large eggs whites

pinch of cream of tartar

½ pound (2 sticks unsalted butter)

2 tsp. vanilla extract


food coloring, for decoration (optional)
Fall Sprinkle Mixes, for decoration (optional)
Cosmic Shimmers, for decoration (optional)
edible leaves, for decoration (optional)


Directions
Place cupcake liners in cupcake pan.  In a medium sized bowl, combine together flour, cocoa powder, baking powder and salt. Set aside. Using a stand mixture, cream butter and sugar in a large bowl for approximately 10 minutes. Add eggs one at a time to the creamed mixture. Add vanilla extract.


Add ⅓ of the flour mixture. Mix until combined. Add half of the buttercream. Repeat this process, beginning and ending with flour. Add reheated coffee to the mixture. Mix until completely combined, be careful not to over mix.

Using ice cream scoop place batter into muffin tins. Bake at 350 degrees for 22-25 minutes or until tester comes out clean. Place on baking rack. Let cupcakes cool completely.

For buttercream, place a small saucepan over medium heat, bring sugar and water to a boil. Boil until syrup reaches soft-ball stage (238 degrees on a candy thermometer).In an electric mixer fitted with the whisk attachment, beat egg whites with an electric mixer on low until foamy. Add cream of tartar; beat on medium high until stiff but not dry.With mixer running, pour syrup down side of bowl into egg whites in a steady stream, and beat on high speed until steam is no longer visible, about 3 minutes. Beat in butter a few pieces at a time. Add vanilla and beat until smooth. If it looks curdled at any point, keep beating to smooth out.

Using a piping bag or a large plastic bag, pipe frosting onto cupcakes. Decorate using colored buttercream frosting, Fall Sprinkle pack and Cosmic Shimmers. Top with edible leaves.

Devour and enjoy!!

A to Z Cake (Apple Butter/ Zucchini) Cake

Once again it’s another fabulous day in Fall. For many, including myself, that means frolicking through someone’s orchard picking apples and stuffing one’s face full of cider and doughnuts. After a few weeks there comes a realization that I may have been a little over zealous during my apple picking. Then comes the panic of so many delicious freshly picked apples going to waste from not being sure of what to do with them. Of course there is the traditional apple pie, apple sauce and apple butter, but its easy to grow tired of the same recipes every year. I decided to go one step further and use a traditional apple recipe to make something new and fresh.

Last apple season I actually made my own apple butter from extra apples I had laying around. Apple butter stores very well and lasts a long time. I sterilized my jars using my dishwasher and stored my homemade apple butter in the refrigerator for safe keeping. I decided to make a cake out of my butter this year instead of smearing it on my usual whole wheat English muffin or oatmeal for breakfast. I had some leftover zucchini that my mom gifted me from her garden so I figured I’d incorporate that as well. Below is what I came up with and I was quite pleased with the results.


Recipe below

Music: All Roads- The Foreign Exchange

Ingredients

2 cups all purpose flour

1 ½ tbsp. baking soda

¾ tsp. table salt

½ tbsp. cinnamon

1 cup vegetable oil

1 cup granulated sugar

¼ cup light brown sugar, lightly packed

4 large eggs, room temperature

1 cup apple butter

zest of one lemon (approximately 1tbsp.)

2 cups zucchini, finely shredded and drained well

Glaze

2-2 ½ cups of confectioner’s sugar

1 cup of apple juice

juice of one lemon (approximately 2 tbsp.)

Dried apples for decoration (optional)

Directions

Preheat oven to 350F. Grease and flour your bundt pan.

In a medium sized mixing bowl mix together flour, baking soda, salt, and cinnamon. Set aside.

In a large bowl or using a stand mixer beat oils and sugars together. Beat on medium speed until the mixture is fully combined. Add eggs one at a time to the mixture. Add apple butter to the mixture until fully incorporated. Add lemon zest. Slowly add the flour mixture one half at a time. Mix until fully combined but be careful not to over mix. Fold in zucchini until fully combined and evenly distributed.

Transfer batter to the cake pan and smooth batter until even in the pan. Hit cake pan onto the counter a few times to knock out air bubbles. Bake cake for approximately 50-55 minutes until toothpick or cake tester comes out clean.

While cake is baking make glaze. In a saucepan cook apple juice on medium-high heat until reduced down to approximately ¼ cup. (juice will be thick like maple syrup). Allow juice to cool completely.

In a medium sized bowl whisk together confectioner’s sugar, apple juice, and juice of lemon until smooth. Place cake onto cake rack and allow to cool completely. Invert cake onto cake plate or board. Pour glaze onto cake. Decorate with dried apples. (optional)

Devour and enjoy!

Apple butter/ Zucchini Cake

Pumpkin King Cake

Happy Friday everyone! Another weekend in this wonderful season of Fall means another chance to bake something yummy full of Fall flavors. A few years ago I was perusing the clearance area in my favorite store’s kitchen section. It was off season so I was able to score some great Fall buys including a clearance pumpkin shaped cake pan. I definitely could not pass up this bargain. I bought it and stuffed in the drawer with the rest of my novelty cake pans and pondered what to make to fill this magnificent find. It took me a few years, but I finally made a cake recipe to (Fall)fill my pumpkin cake fantasies.

I came up with a great pumpkin cake recipe that is light but perfectly balanced with taste of pumpkin and warm spices. This cake is then glazed with a creamy pumpkin spice liqueur for the perfect sweetness and color. This cake is a definite must for this season and perfect to make and decorate with kids.

Here is where you can buy a similar pumpkin shaped pan for your cake.

Recipe is below

Pumpkin King Cake
Music: Amnesia- Justin Timberlake

Ingredients

3  cups of all purpose flour

1 tbsp. baking powder

1 tbsp. baking soda

1 tsp. table salt

½ tbsp. pumpkin pie spice

½ tbsp. cinnamon

1 cup vegetable oil

1 cup granulated sugar

1 cup light brown sugar, lightly packed

4 large eggs, room temperature

16oz. ( 1 can) pumpkin puree’

Glaze

2-2 ½ cups of confectioner’s sugar

¼ cup Trader Joes Pumpkin Spice Cream liqueur

¼ tsp. of salt.

¼ tsp. pumpkin pie spice

Orange gel food coloring, (optional)

Gold Cosmic Shimmers (optional)

Orange pearl sprinkles from Fall Through Sprinkle Mix (optional)

Directions

Preheat oven to 350F. Grease and flour your pumpkin king pan or 9″ x 13″ pan.

In a medium sized mixing bowl mix together flour, baking powder, baking soda, salt, pumpkin pie spice and cinnamon. Set aside.

In a large bowl or using a stand mixer beat oils and sugars together. Beat on medium speed until the mixture is fully combined. Add eggs one at a time to the mixture. Add pumpkin puree to the mixture until completely incorporated. Slowly add the flour mixture one half at a time. Mix until fully combined but be careful not to over mix.

Transfer batter to the cake pan and smooth batter until even in the pan. Hit cake pan onto the counter a few times to knock out air bubbles. Bake cake for approximately 35-40 minutes until toothpick or cake tester comes out clean.

While cake is baking make glaze. In a medium sized bowl whisk together confectioner’s sugar, liqueur, salt, pumpkin pie spice and food coloring until smooth.

Place cake onto cake rack and allow to cool completely. Invert cake onto cake plate or board. Pour glaze onto cake. Decorate with fondant, Cosmic Shimmers and orange pearl sprinkles.

Devour and enjoy!

Sweet Potato Scones

Once again its another wonderful Fall day. My home is filled with wafts of pumpkin spice from one of my favorite lit candles. The scents of Fall always puts me in the mood to turn on my oven and bake something. This time I decided to switch up the traditional pumpkin confection for something that hits closer to home and my heart. Sweet potatoes have been a staple in my heritage and family celebrations for years. Why not conquer a traditional treat and add a little more soul and pizzaz. I’m sure we have all darted off to the king of gentrification coffee shop and picked up a pumpkin spice latte and the famous pumpkin scone during the season. Being that today is National Coffee Day I decided to make my own spin on a scone. Check out my recipe for Sweet Potato Scones below. Its filled with not only sweet potatoes but warm notes of nutmeg and a hint of orange. Delicious!

Step by Step Sweet Potato Scones
Music: All I Ever Wanted- Teedra Moses feat. Rick Ross

Recipe

Ingredients

2 cups all purpose flour

1 tsp. baking powder

½ tsp. baking soda

1 tsp. cinnamon

½ tsp. fresh nutmeg

¼ tsp. salt

½ tsp. orange zest

½ cup (1 stick) cold butter, cubed

⅓ cup brown sugar, lightly packed

½ cup of pureed sweet potato

1 large egg

3 tbsp. buttermilk

Glaze

2 cups confectioner’s sugar

½ tsp. of orange zest

1 tsp. vanila extract

2-3 tbsp of milk (I used almond )

orange food coloring (optional)

Sweet Potato Pie Sprinkle Mix (optional)

Directions

Preheat oven to 400F. Line cookie sheet with parchment paper.

In a large mixing bowl mix together flour, baking powder, baking soda, cinnamon, nutmeg, orange zest and salt. Add cubed butter using a fork to press butter into flour mixture, until combined and it resembles course sand. Set aside.

In a medium sized bowl add brown sugar and sweet potato, buttermilk and egg and stir until combined together. Add the wet mixture to the dry ingredients. Mix together using a spatula or your hands until it forms a dough.

Press the dough out onto a floured surface and form it into a disk about one inch thick. Cut disk into eight pieces. Bake at 400F for 15-20 minutes.

While scones are baking, in a small bowl whisk together confectioner’s sugar, orange zest, vanilla extract and milk. Whisk until the glaze is nice and smooth and runny. Add food coloring (optional).

Once the scones have cooled to room temperature. Dip the scones into the glaze to cover them completely. Sprinkle your Sweet Potato Pie Sprinkle Mix on top.

Devour and Enjoy!

Candy Corn Cookies

It’s the most wonderful time of the year! To me this means its Fall and I can start consuming massive amounts of pumpkin items and filling my home with the smells of such. I love everything that comes with this season. That even includes the controversial confection candy corn. Some love to love it, while others hate the stuff describing it as sugary wax. Although I do prefer the mellow creme pumpkins over candy corn, I still consider candy corn one the essential items for Fall.

I have always snacked on candy corn straight out the bag, stuffing my face with no regret. This year I decided to try and feature this wonderful candy in another way. Why not try it in a cookie? I must say that I was quite pleased with the results. The candy corn melts and caramelizes for an even better flavor profile.

Give these perfect Fall sweet treats a try!

Candy corn cookies step by step video

Recipe

Ingredients

1 ¼ cups of flour

1 cup of old fashioned oats

1 tsp of baking soda

1 tsp of salt

1 cup (2 sticks of butter)

1 cup of light brown sugar, packed

2 eggs

1 tsp of vanilla

½ zest of lemon (approx ½ tsp.)

1 cup of candy corn, roughly chopped

½ cup Fall Through Sprinkle mix (optional)

Directions

Preheat oven to 375F.

In a medium sized bowl mix together the flour, oats, baking soda and salt. Set aside. In a large separate bowl, using either hand or stand mixer, cream together butter and brown sugar. Add eggs one at a time. Mix until smooth. Add vanilla extract and lemon zest. Add half of flour mixture to cream mixture and stir until incorporated. Add second half of flour mixture. Stir until incorporated. Add candy corn and sprinkles to batter. Slowly fold in until combined.

Line cookie sheets with parchment paper. Using cookie scoop or ice cream scoop, place cookie dough onto sheets about 1.5-2 inches apart. Bake for 12-15 minutes until cookies are slightly golden and firm to touch. Remove from oven and allow cookie to cool completely to room temperature.

Devour and Enjoy!!

Happy Heavenly Birthday Kobe!

For those readers who don’t know I am not just a Kobe fan, I am his true number one fan. I have been celebrating August 23rd as a holiday since 1996. Usually for the Black Mamba’s birthday, I bust out my personally recorded VHS highlight tapes and spend my day reliving his career. This year of course hit me different and a lot harder. I have been thinking about this day since January of this year. I have been pondering how I could possible present and celebrate Kobe’s birthday the way his special day should be celebrated. So many thoughts and ideas have crossed and continually cycled in my mind. For my birthday this year, which I dedicated to Mamba, I made a personalized denim jacket and admired his and Gigi’s memorial artwork spread throughout Los Angeles. Even after that day I felt like I wasn’t doing enough for Kobe. That mamba mentality was engrained in me years ago which meant that I had to serve the epitome of excellence for this celebration. I finally decided that I could at least start with the perfect birthday cake. This is what I came up with for Kobe’s special day:

Kobe Letter Cake (adapted from Vintage Cakes, Texas Sheet Cake recipe)

Ingredients

Cake:

2 cups (1 pound) of unsalted butter

1 cup unsweetened Dutch cocoa powder

¼ cup plus 2 tbsp. of canola oil

2 cups of water

2 tbsp. of brewed coffee (new or old will do)

4 cups of all purpose flour

4 cups of granulated sugar

2 tsp. of baking soda

2 tsp. of table salt

4 eggs, room temperature

1 cup of buttermilk

1 tbsp of vanilla extra

Meringue Buttercream Frosting:

12 egg whites, room temperature

2 ½ cups (17 ½ ounces) of sugar

½ tsp. of cream of tartar

4 cups (2 pounds) unsalted butter, at room  temperature, cut into small cubes

1 tbsp. of vanilla extract 

¼ tsp. of salt

Directions

For the cake:

  1. Preheat the oven to 375F degrees.
  2. Cut out parchment paper and layer on the bottom of two 11 x 16″ sheet pans. Oil and flour well. Set aside.
  3. In a large saucepan, melt butter over a medium heat. Whisk in the cocoa. Add in the oil, water and coffee and bring to a boil.
  4. Boil cocoa mixture for approximately 30 seconds. Remove the pan from heat and set it aside to cool slightly.
  5. In a very large mixing bowl, sift together flour, sugar, baking soda, and salt. Make a well in the center.
  6. Pour the warm cocoa mixture to the sifted ingredients and whisk until just combined.
  7. In a separate small bowl, whisk together eggs, buttermilk, and vanilla.
  8. Using a rubber spatula, stir the buttermilk mixture into the batter.
  9. Pour the batter into the two greased sheet cakes. Tap the pans on the counter a few times to release some of the air bubbles. Bake for 22 to 25 minutes, until the tester comes out clean.
  10. While the cake is in the oven, make the frosting.

For the frosting:

  1. Using a hand mixer or whisk, in a heat proof bowl, whisk together the egg whites, sugar and cream of tartar. 
  2. Place the bowl over a double-boiler (saucepan of simmering water). Continue to gently whisk the mixture until it is hot to touch (130F on a candy thermometer).
  3. Transfer the egg whites to the bowl of a stand mixer and, using the whisk attachment, whip the egg whites on medium- high speed until they have tripled in size and are thick and glossy and hold stiff peaks (like meringue).
  4. Turn the mixer down to medium-low speed until the mixing bowl is cool to touch, approximately 3-5 minutes. Kick the mixer back up to medium-high speed and add the butter one piece at a time. 
  5. Stop the mixer every so often to scrape down the butter caught on the side of the bowl. Keep whisking buttercream until it comes together.
  6. Once all the butter is incorporated and the frosting is light and fluffy, add your vanilla extract. 
  7. Cover in plastic wrap and chill for at least 30 minutes before frosting. 
  8. Fill your favorite piping bag with the frosting and use your favorite round shaped piping tip to decorate your sheet cake.

For decorating:

  1. After allowing your sheet cakes to cool completely, use cake stencils to cut out letters in each sheet cake.
  2. Place your first layer of cake letters onto your cake boards and pipe your buttercream onto each letter. Start by outlining your letters with buttercream and then fill in the middle.
  3. Once all your letters have been piped out, place the second layer of cake letter on top of the first layer very gently. Brush away any crumbs.
  4. Repeat step 2 on your second cake layer.
  5. Decorate your cake letters using fresh flowers, fresh fruit, macarons, candy, Cosmic Shimmer, gold leaf, etc.
  6. Devour and Enjoy!!

Happy Heavenly Birthday Kobe! May this cake be a small representation of everything your life and legacy means to me.

DIY: Denim Fringe Jacket

DIY Fringe Jacket

Materials 

  • Denim Jacket 
  • 2 yards of fringe (length of your choice) 
  • Scissors
  • Measuring tape
  • Straight pins
  • Sewing machine
  • Heavy Thread (Denim, Upholstery, of Coats fabric) 
  • Seem ripper
  • E6000 glue
  • Fabric trim (optional) 
  • Assortment of iron-on/sew on patches (optional) 

Instructions

  1. Take your denim jacket and measure the length of your arm sleeve.
  2. Using your seem ripper, remove the seem from the arm sleeve.
  3. Cut the fringe to the estimated length of your arm sleeve and attach it to the open seem line using your straight pins. 
  4. Using your sewing machine/ needle and thread or glue, attach fringe to the arm sleeve. 
  5. Once fringe has been attached to the sleeve, next close your arm sleeve by sewing it or gluing it back together. (Remember not to close the arm all the way to the end of the cuff, as you need space for your arm to get through the jacket) 
  6. Repeat steps 2-6 for the second arm sleeve 
  7. Place jacket with front facing down and measure the back seem of your jacket using your measuring tape. 
  8. Use the same seem ripper to  completely remove the back seem where you will be attaching your fringe.
  9. Cut fringe to desired length and attach it to your jacket using needle/ thread or glue. 
  10. Re-attach your back seem of the jacket together using needle/ thread or glue. 
  11. Using your measuring tape, measure the length of back of jacket from one sleeve to the other following the seem lines. 
  12. Cut trim to the desired length and attach it to the back of your jacket seem lines using glue. 
  13. Apply remainder of patches to the back of the jacket using same glue. 
  14. Apply glue to dry for at least 24 hours.
  15. Once glue has dried, turn jacket onto its back and attach any patches your desire to the front of the jacket.
  16. Decorate the remainder of your jacket as you want. (I painted sleeves and attached more patches) 
  17. Allow everything to dry for another 24 hours. 
  18. You now have a fabulous personalized denim jacket to wear whenever you want 
Step by step: Easy DIY tutorial
Forever Kobe