Happy KOBE Day!

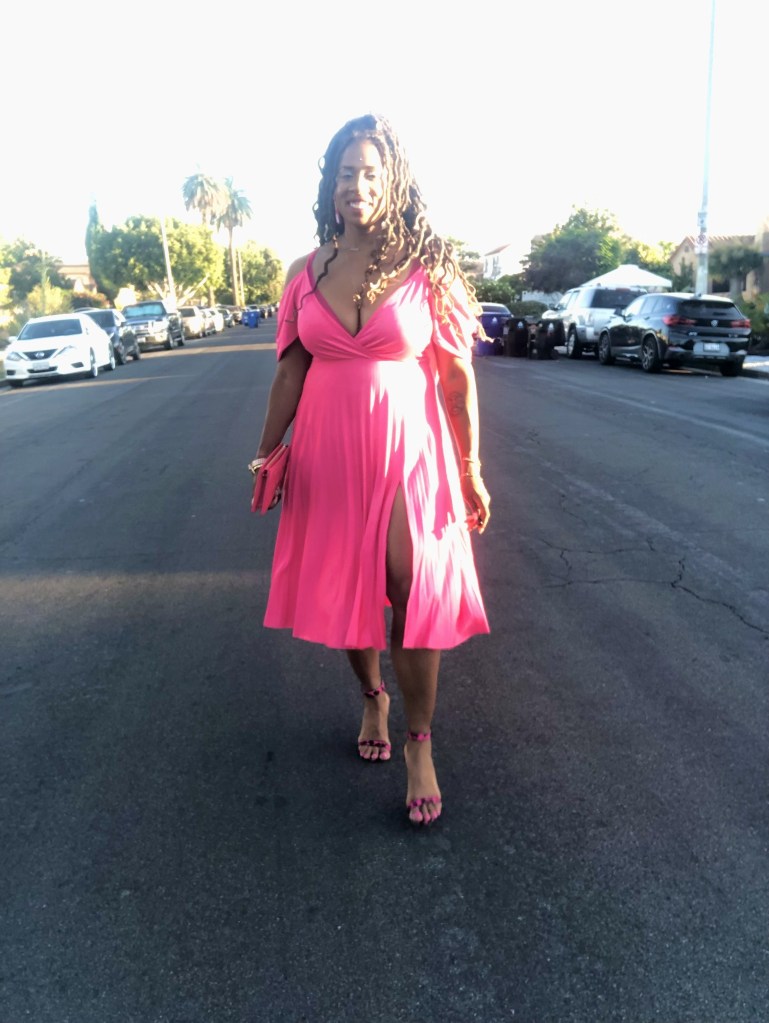
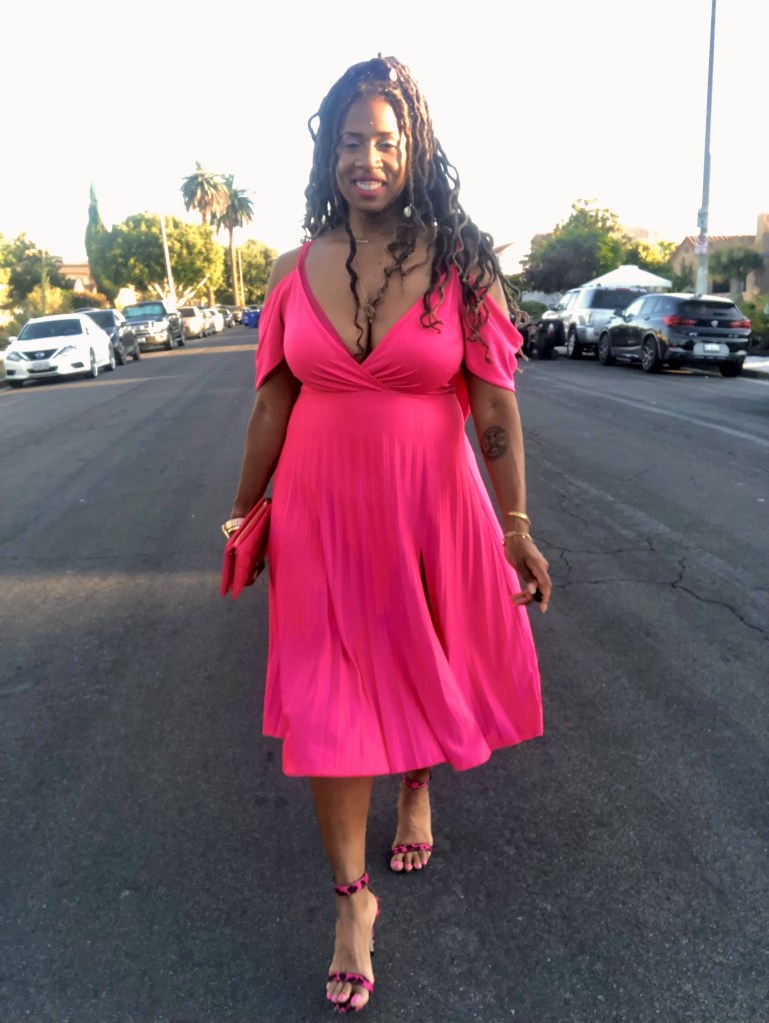
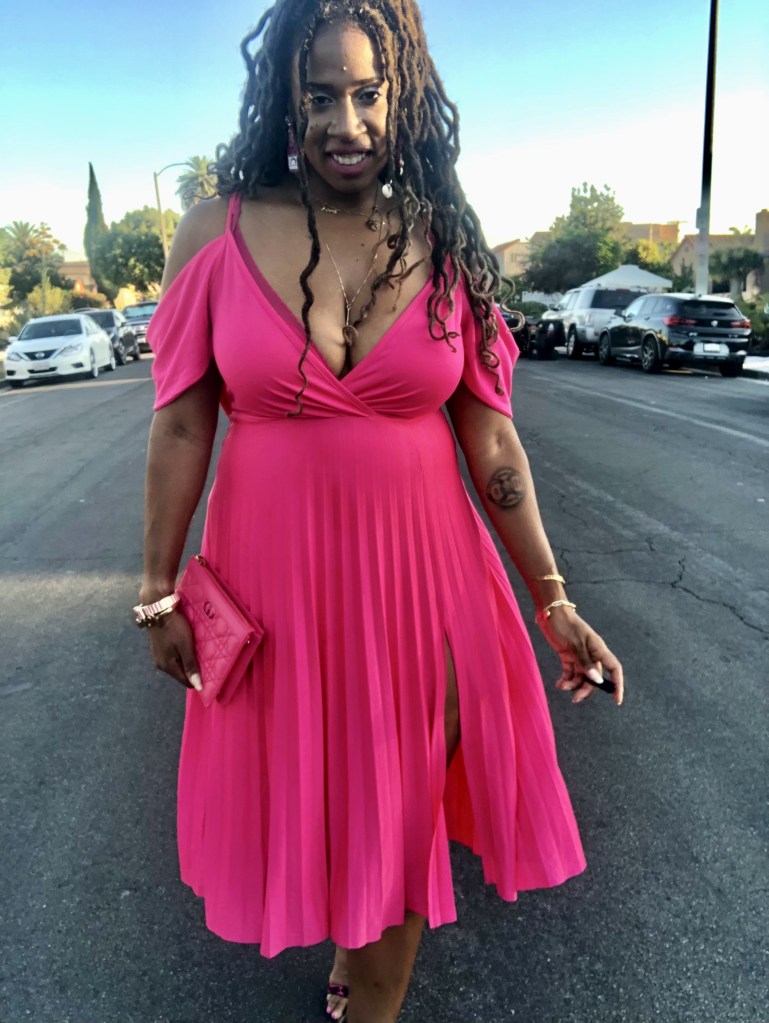
Here we are in 2022 and 3 years into celebrating Kobe’s heavenly birthday. Kobe would be celebrating his 44th birthday this year. It still amazes me how much he accomplished in his short period on this earth. I strive daily to be the best version of myself and continue Kobe’s Mamba Mentality legacy.

As I expressed in my previous Kobe Day post, I have been celebrating August 24th as Kobe Day since 1996. I honestly celebrate daily by living my best life and striving to leave my own legacy. After Kobe’s death, I have been doing some deep self reflecting and trying to discover and implant my own legacy. I have been striving to be the best version of myself daily and have learned that the only way I feel accomplished is through love and creativity. My Mamba Mentality is to encourage others to love themselves first as well as others. Also my legacy is to strive to incite all forms of creativity in others. I believe that we are created to create and make this planet somehow better than we arrived.

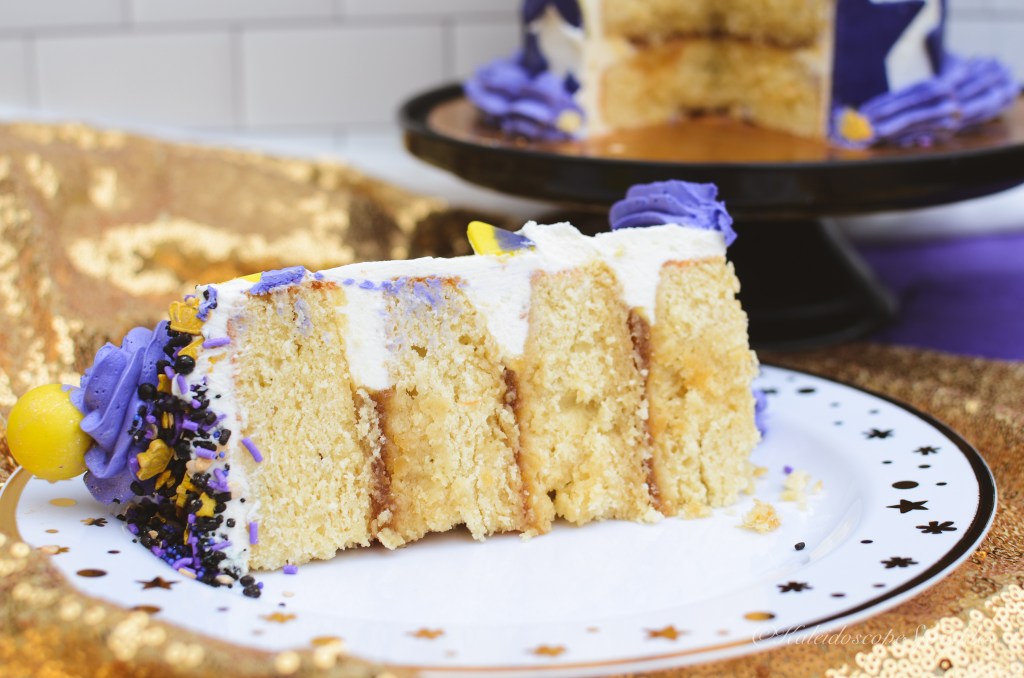
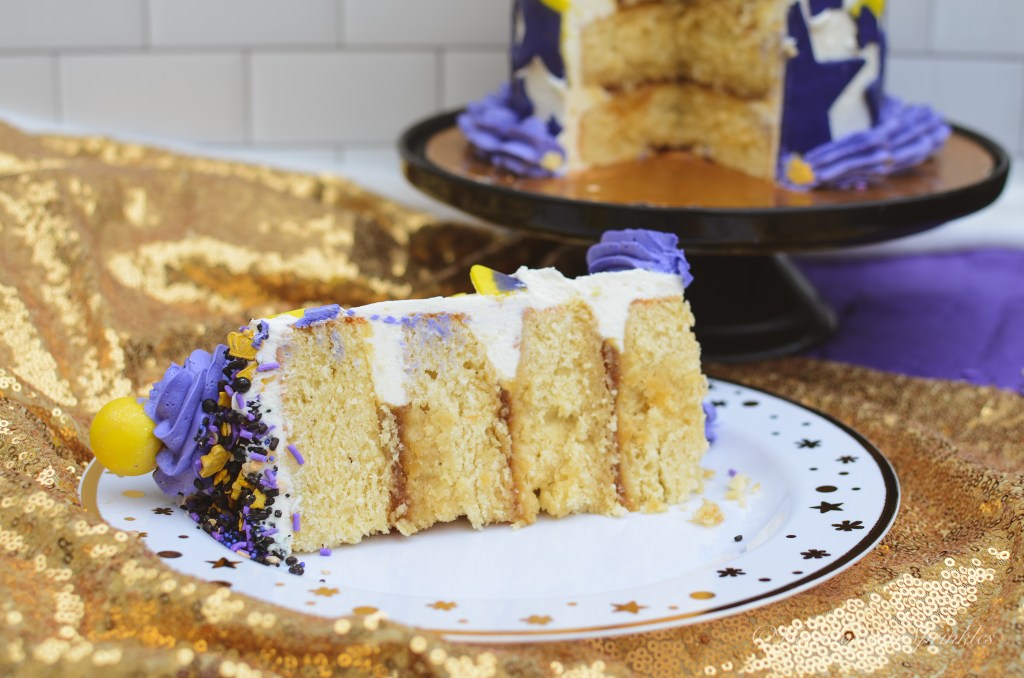
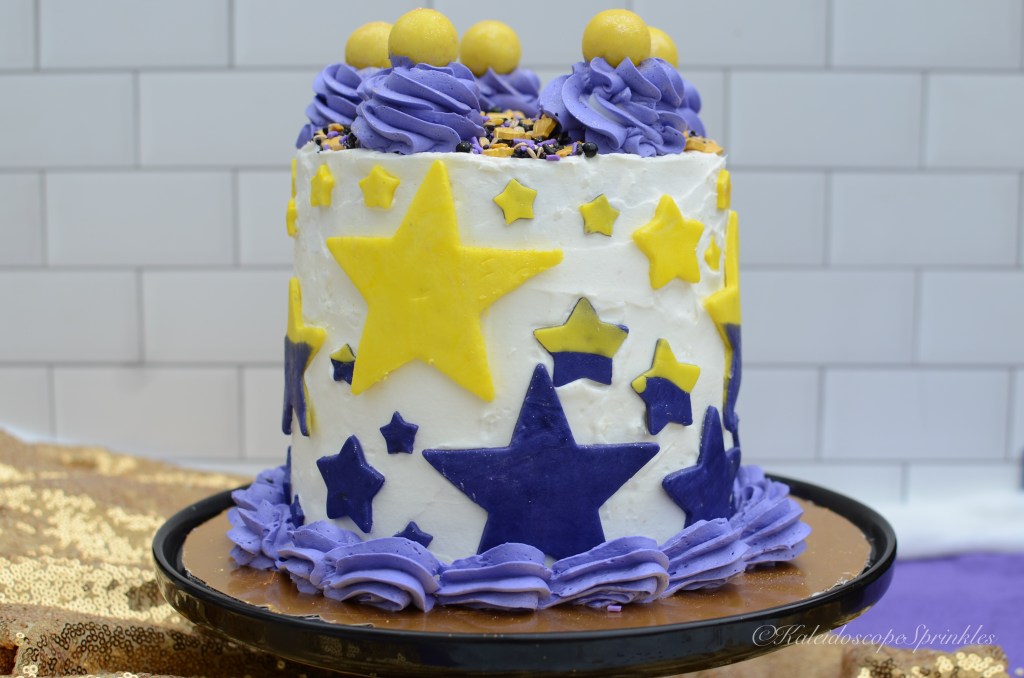
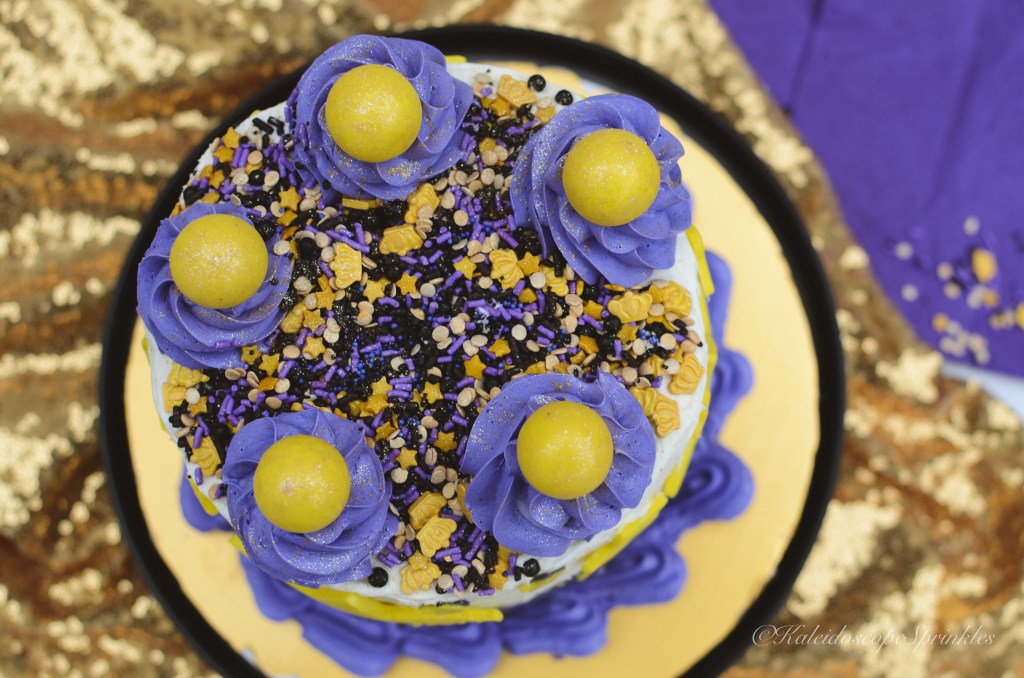
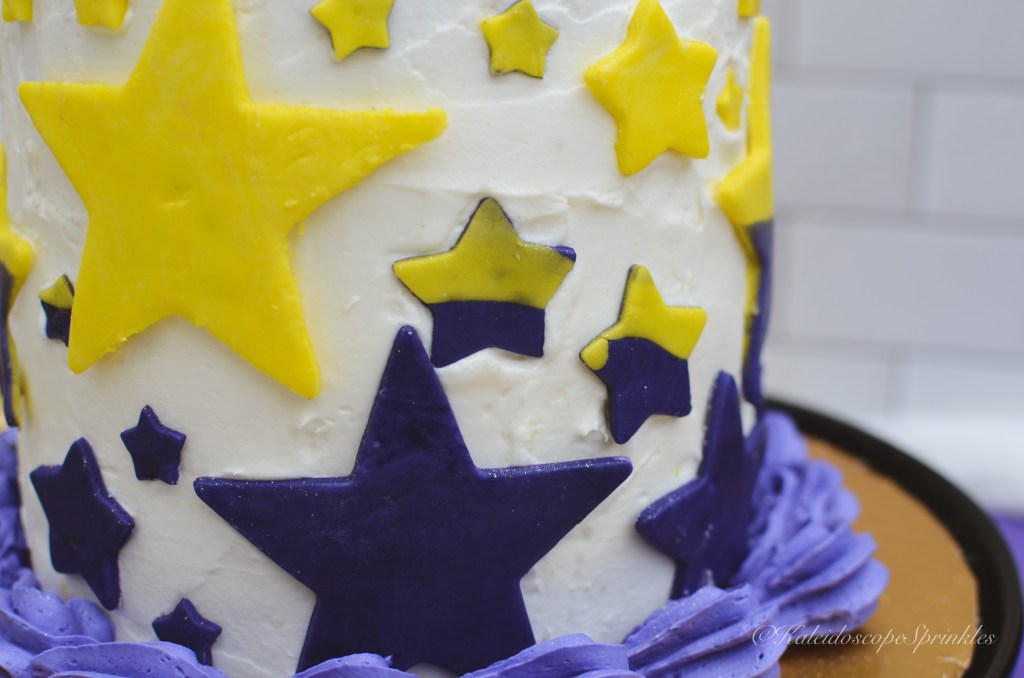
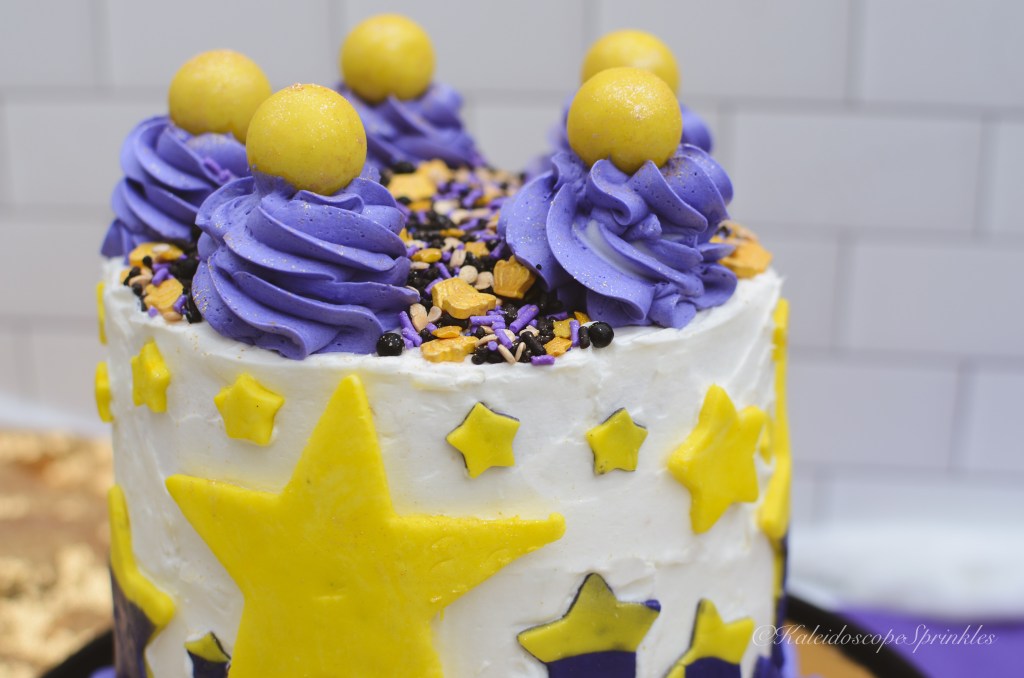
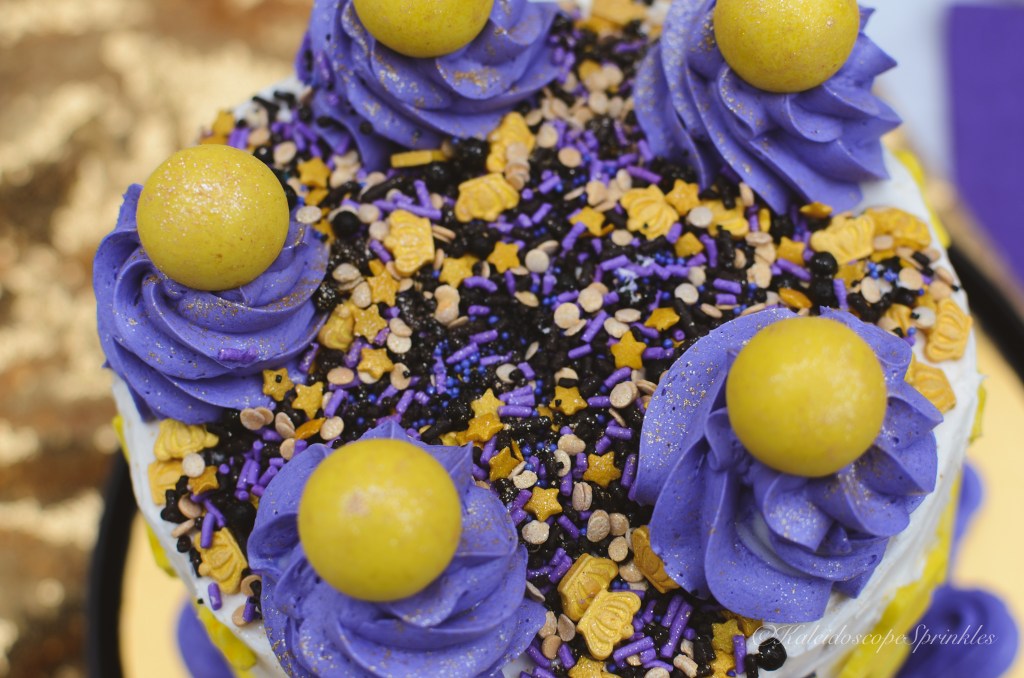
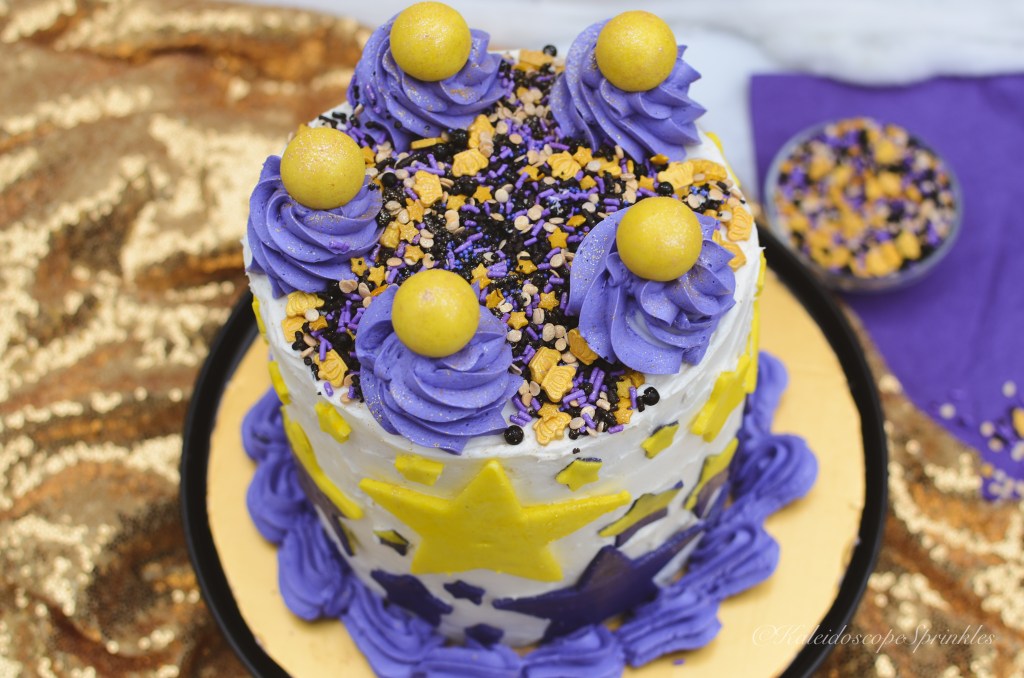
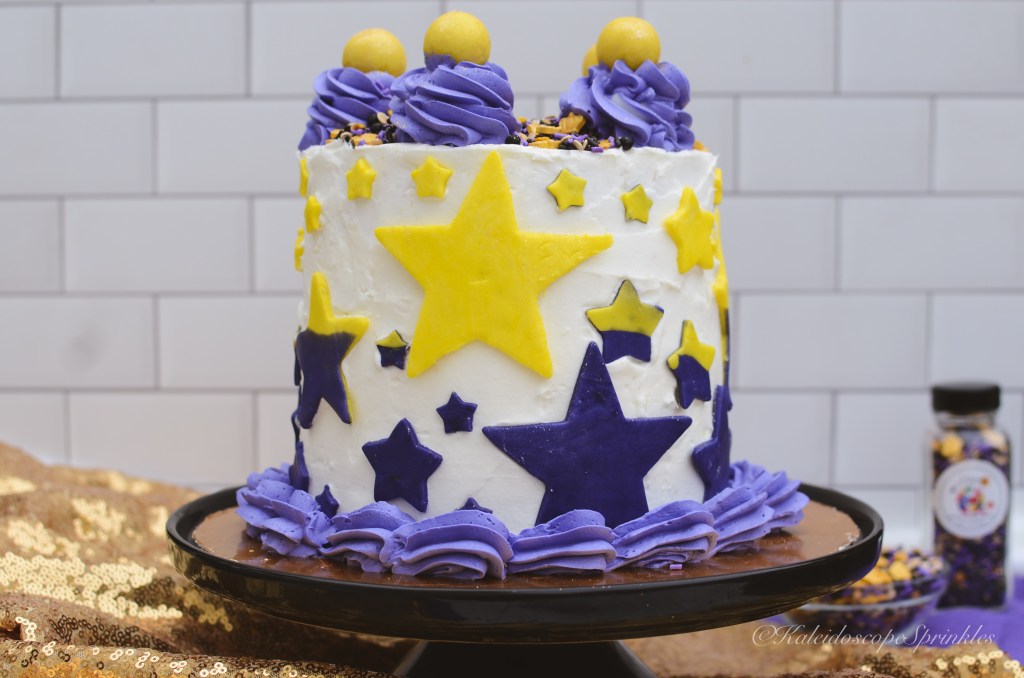
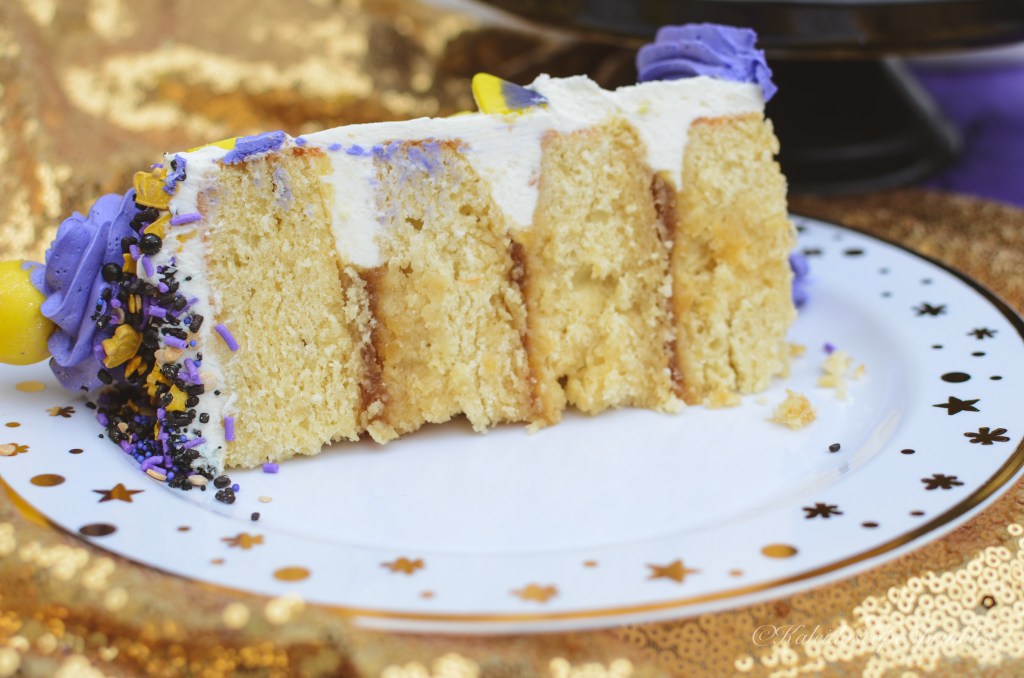
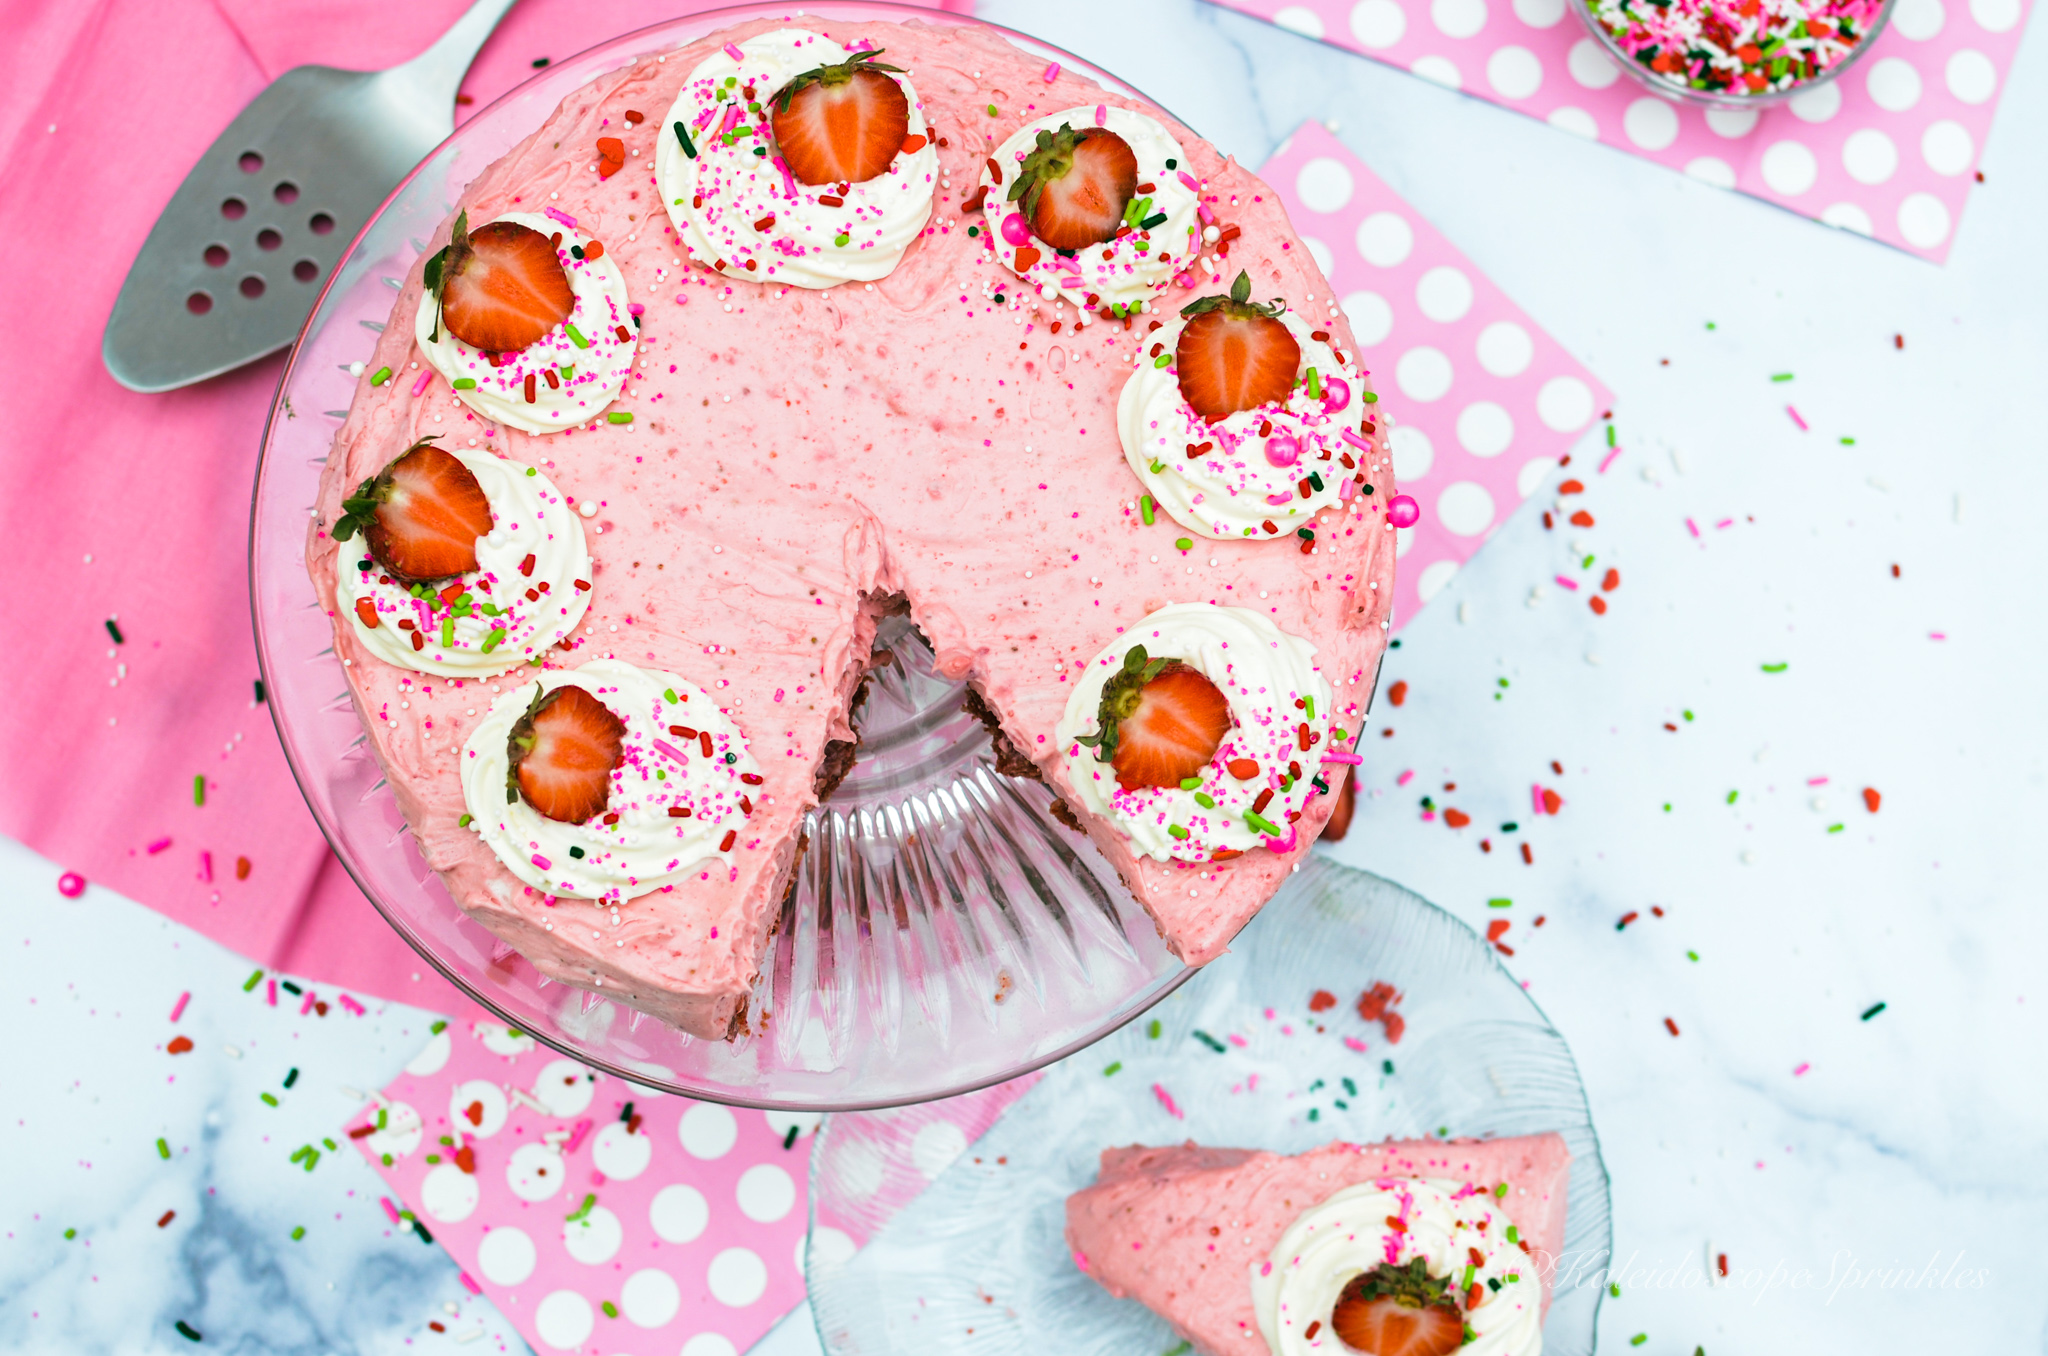
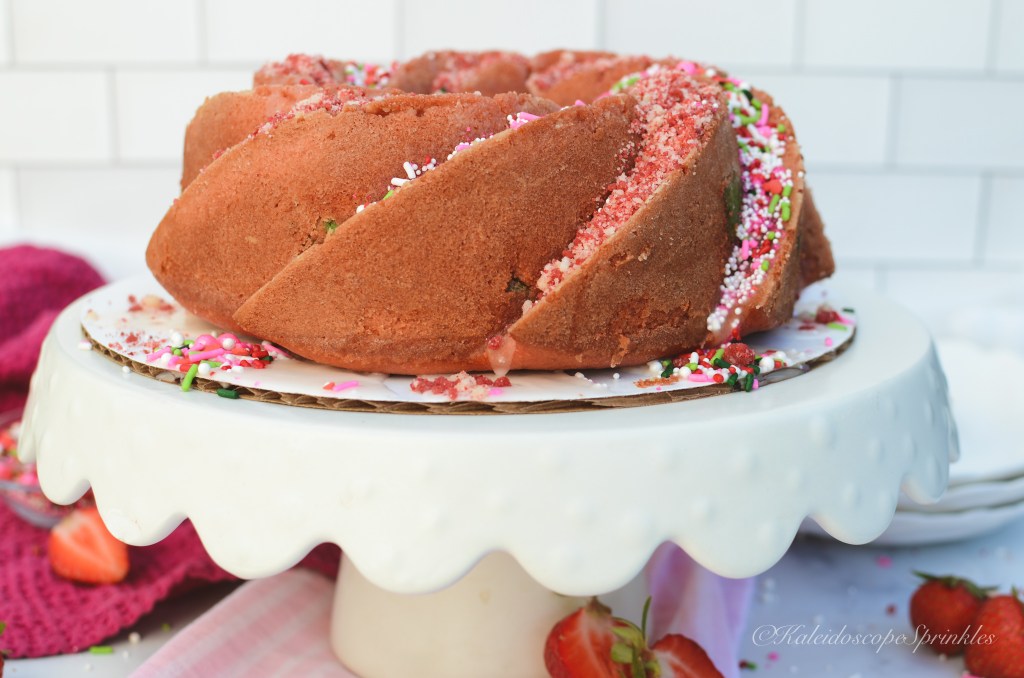
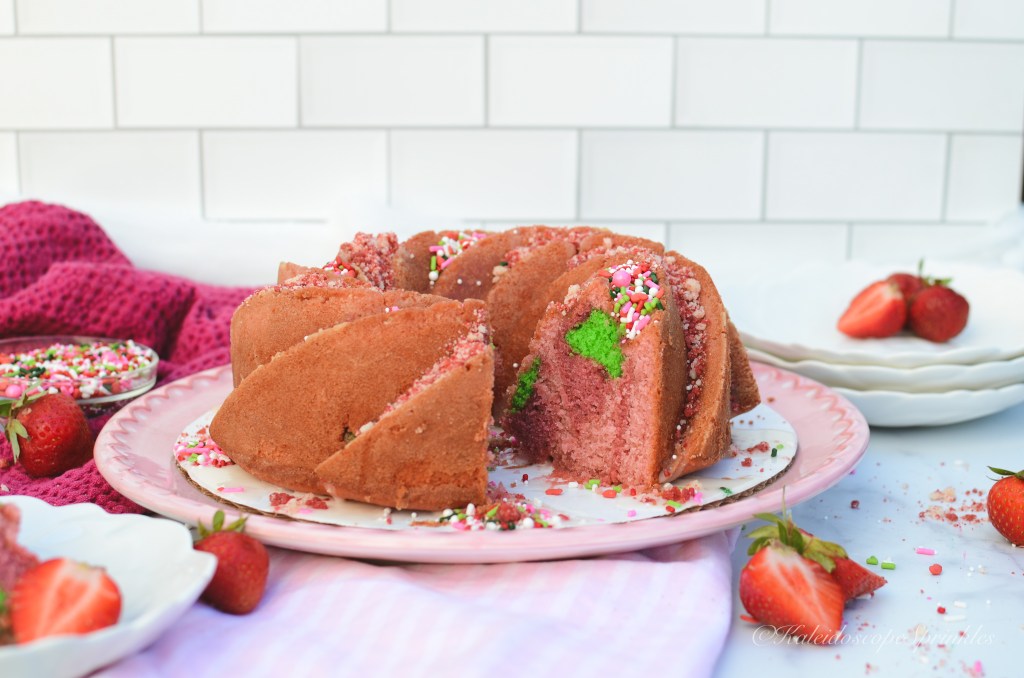
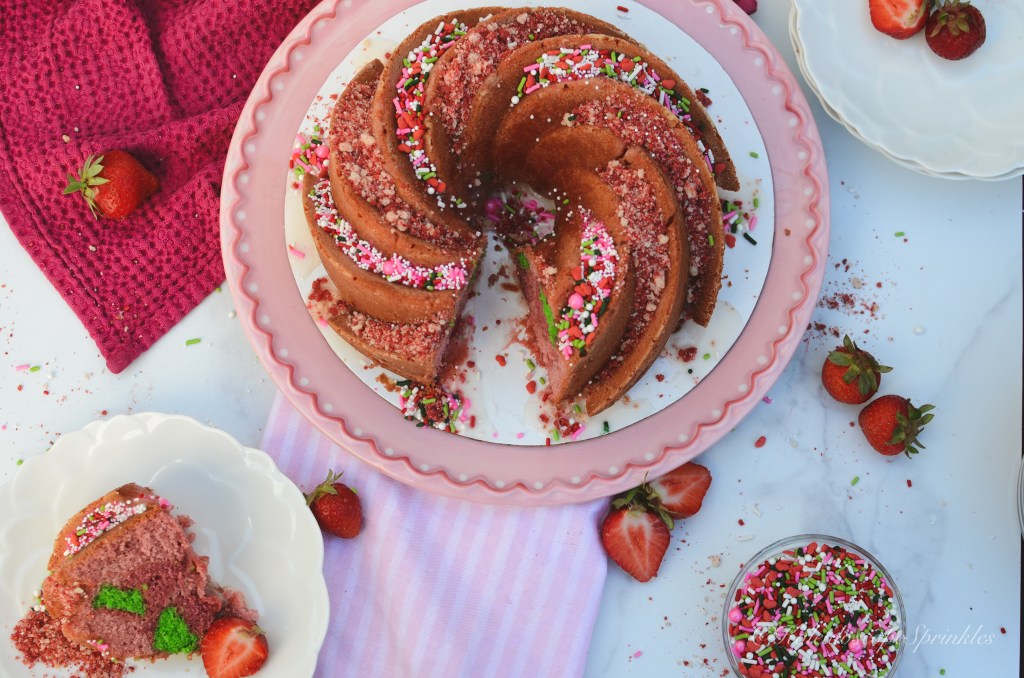
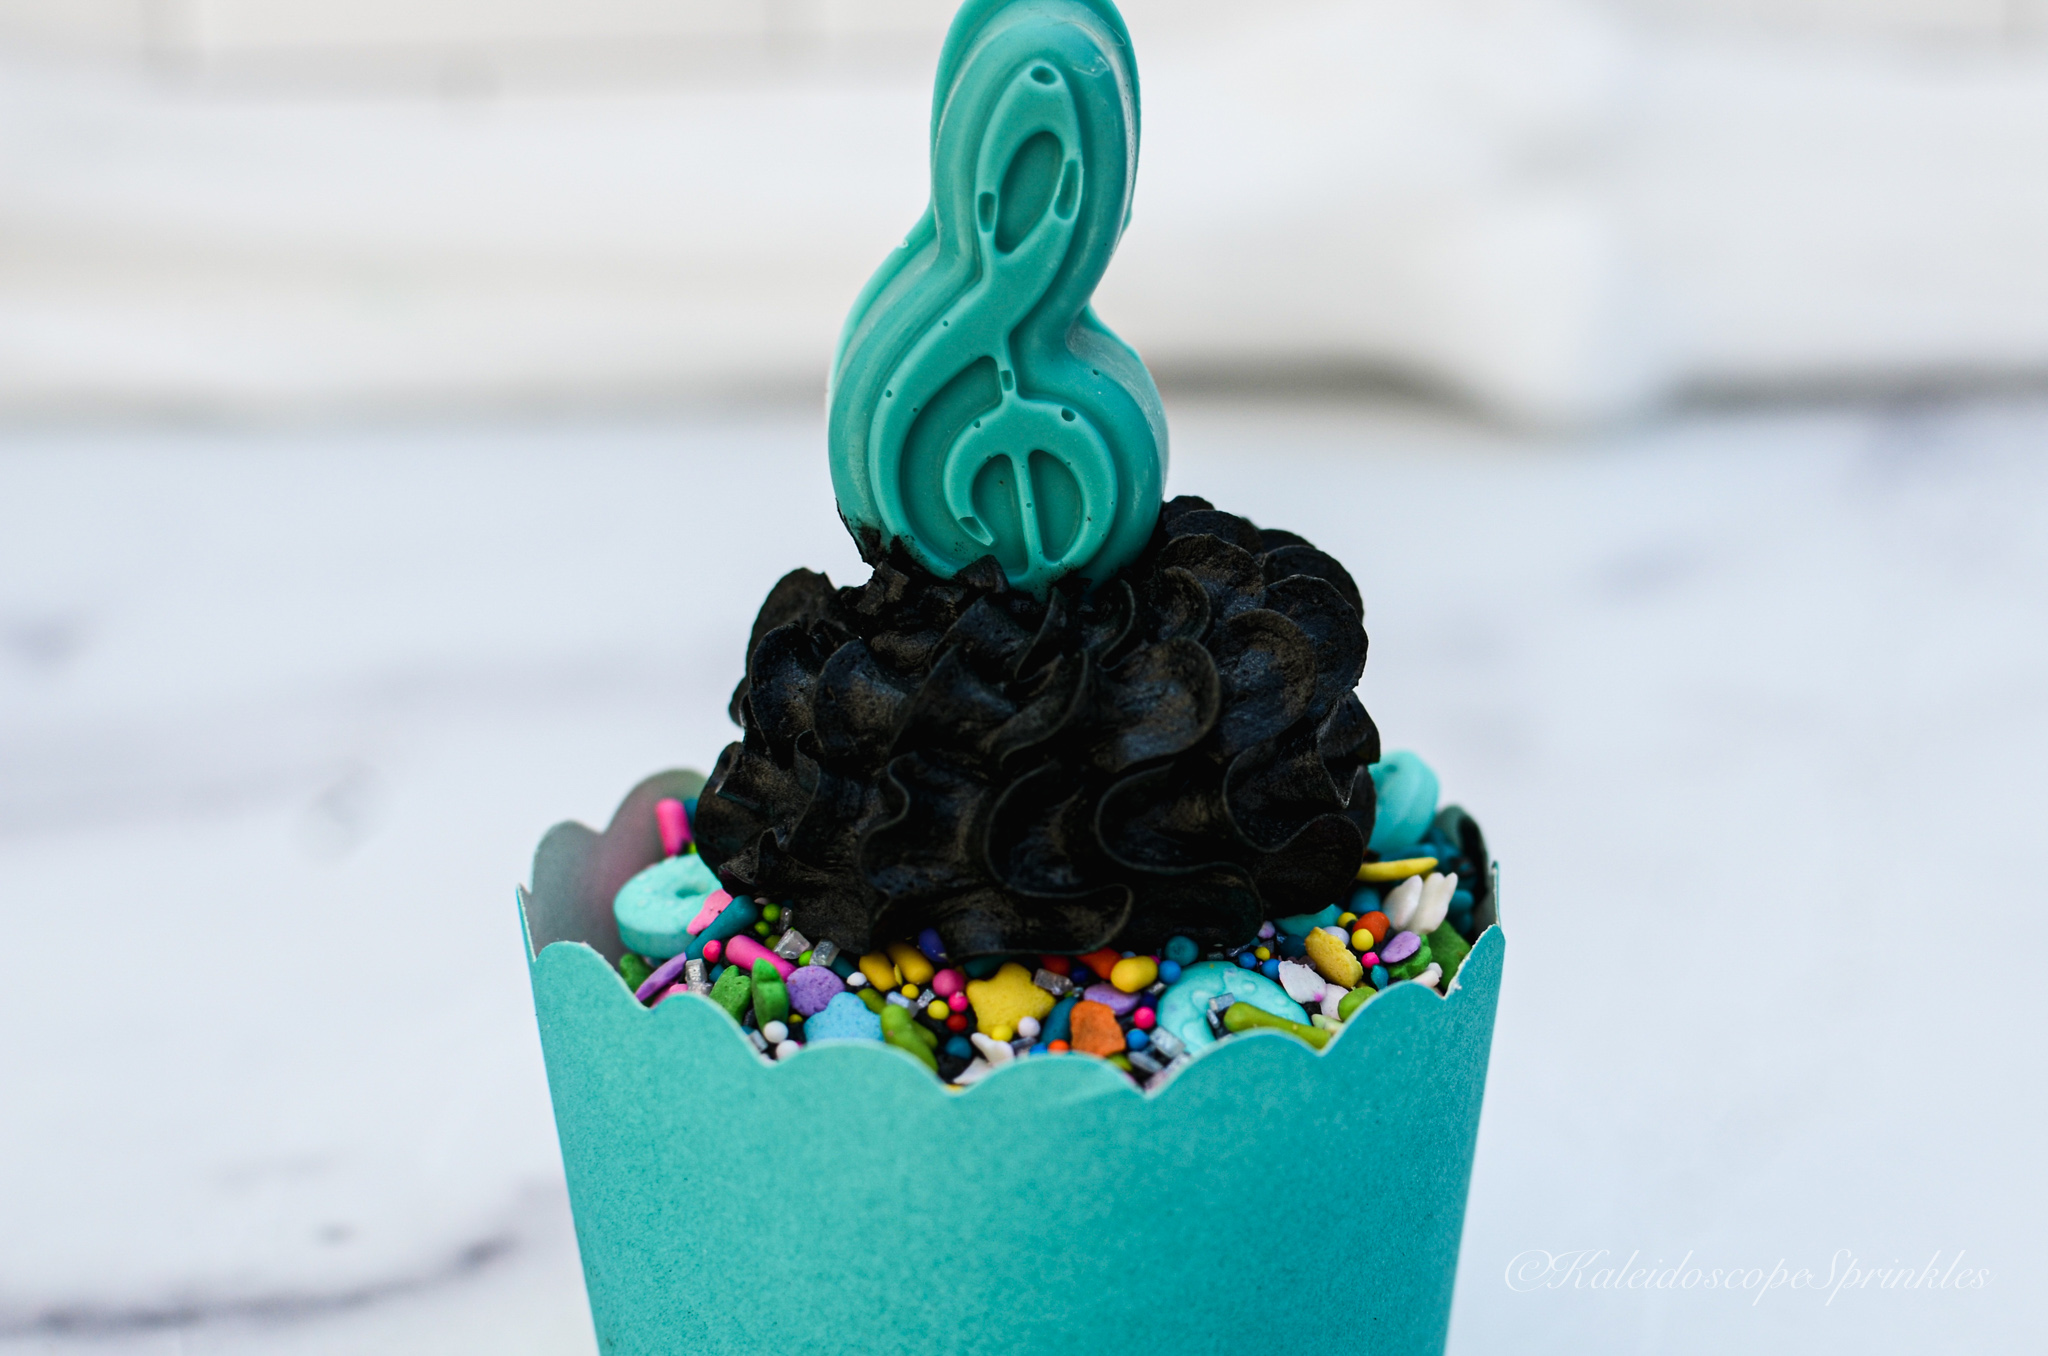
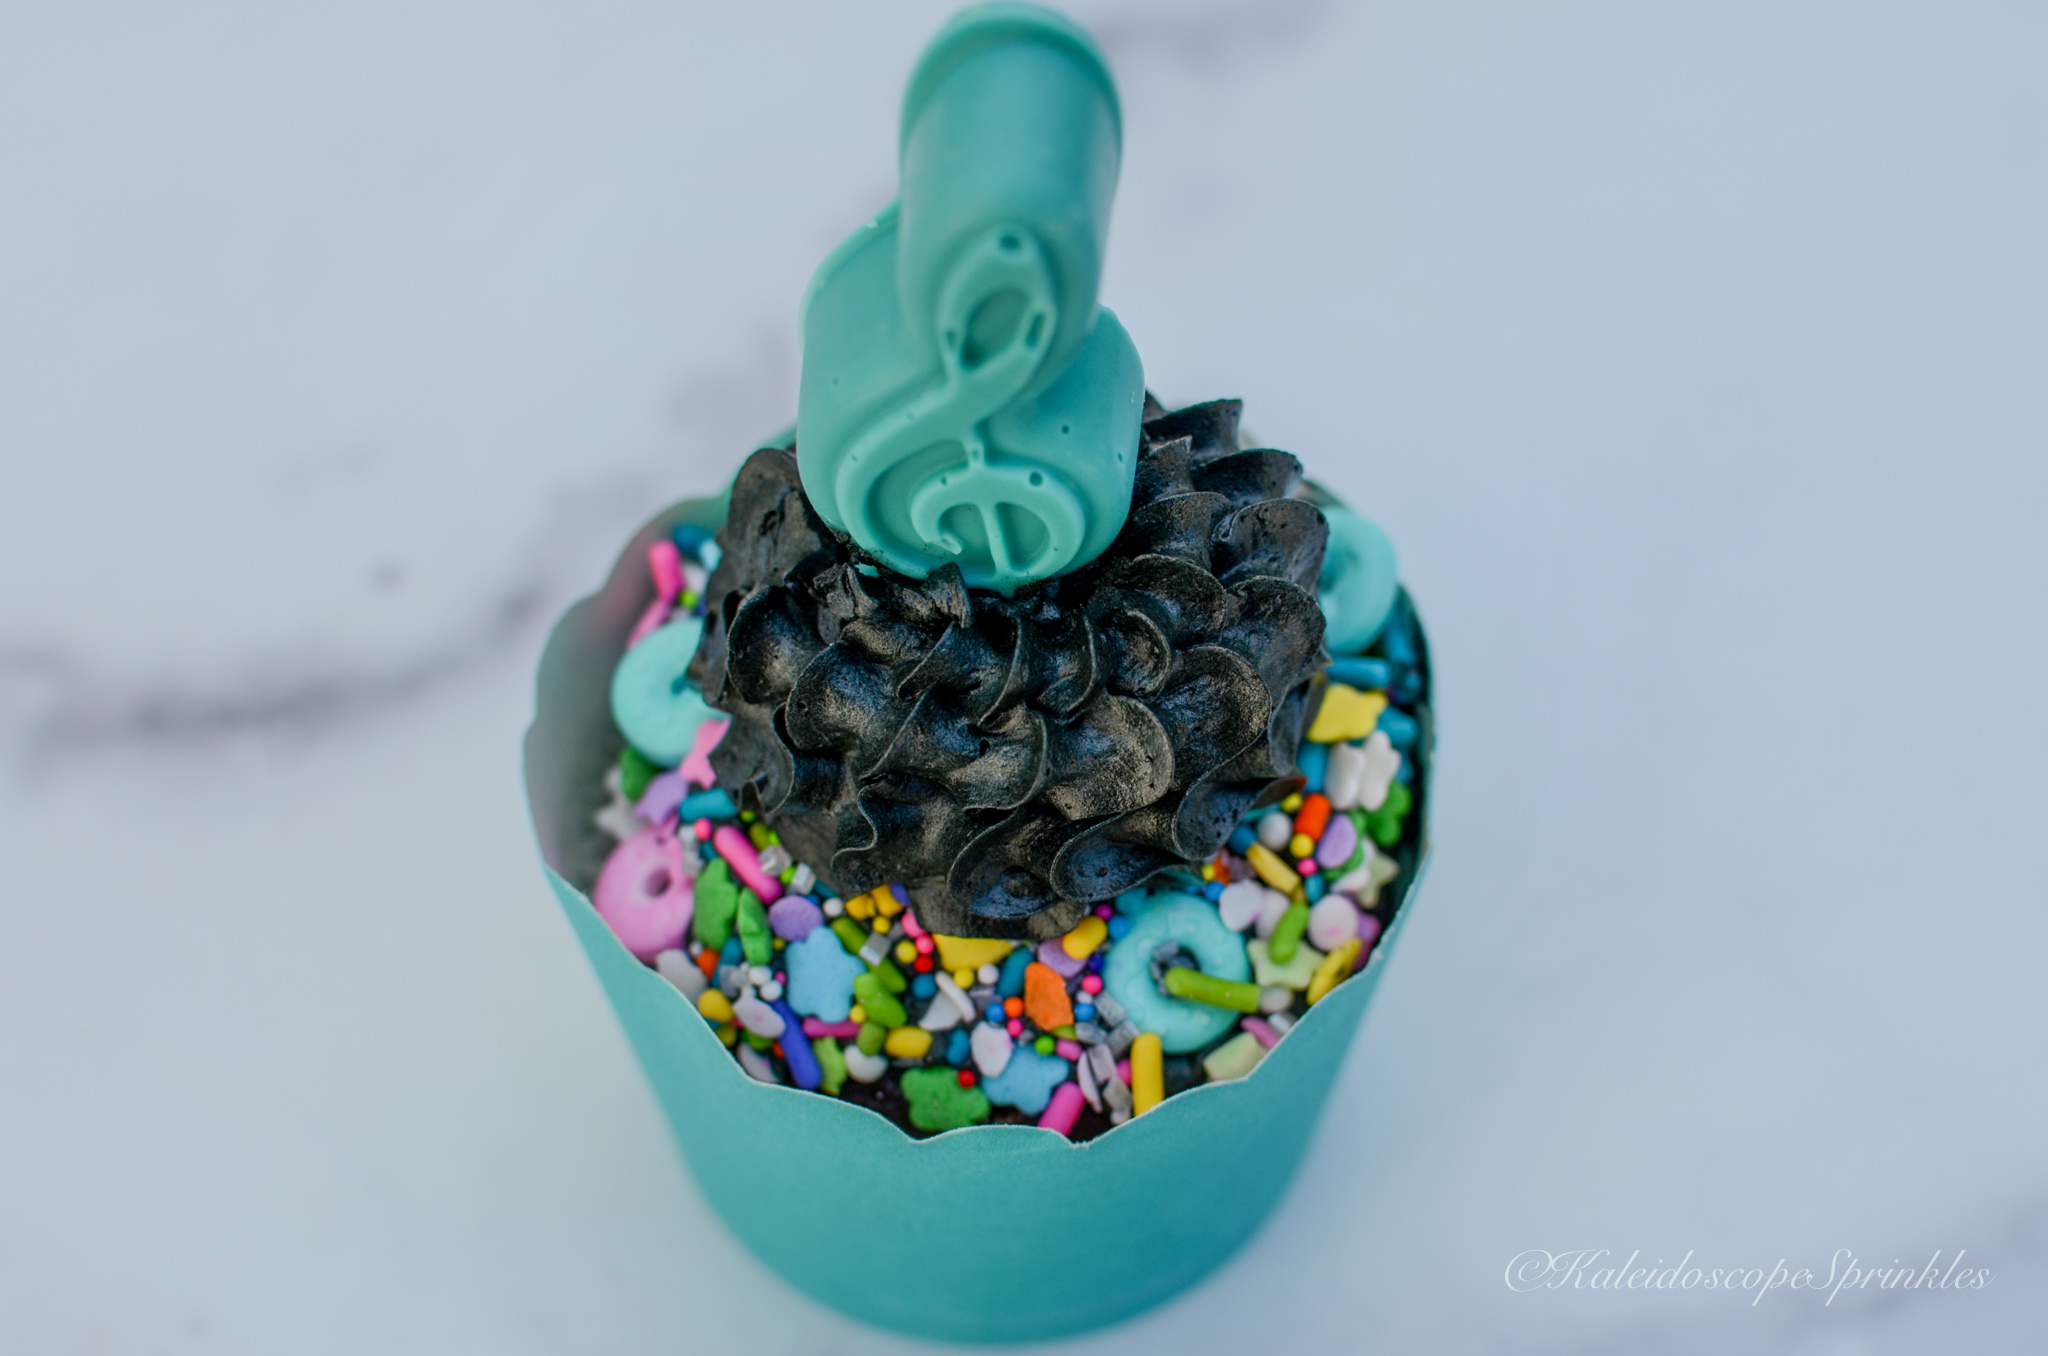
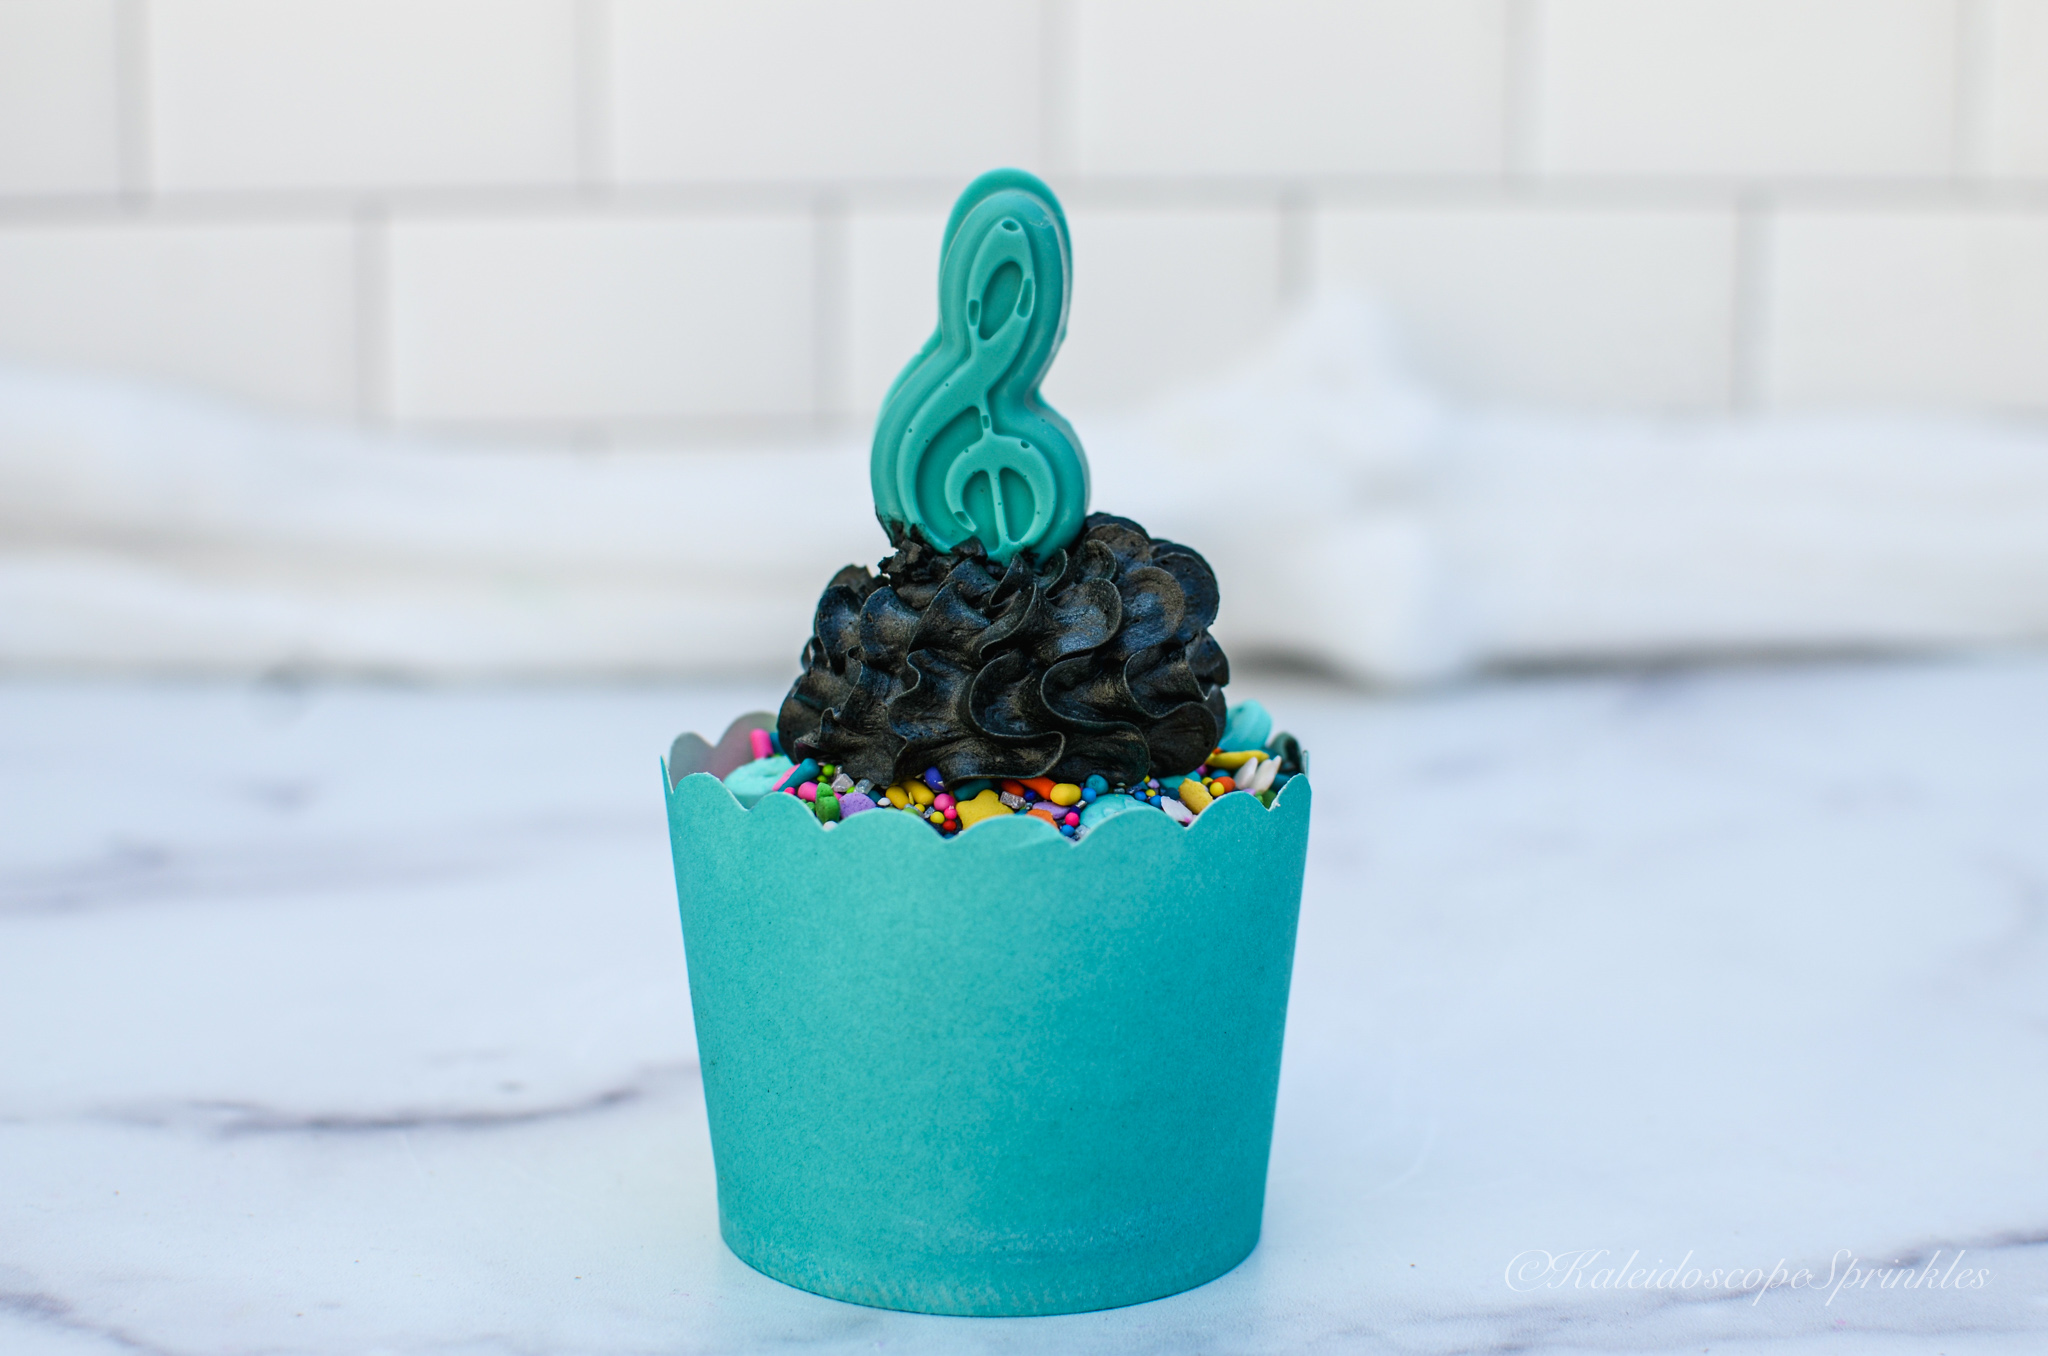
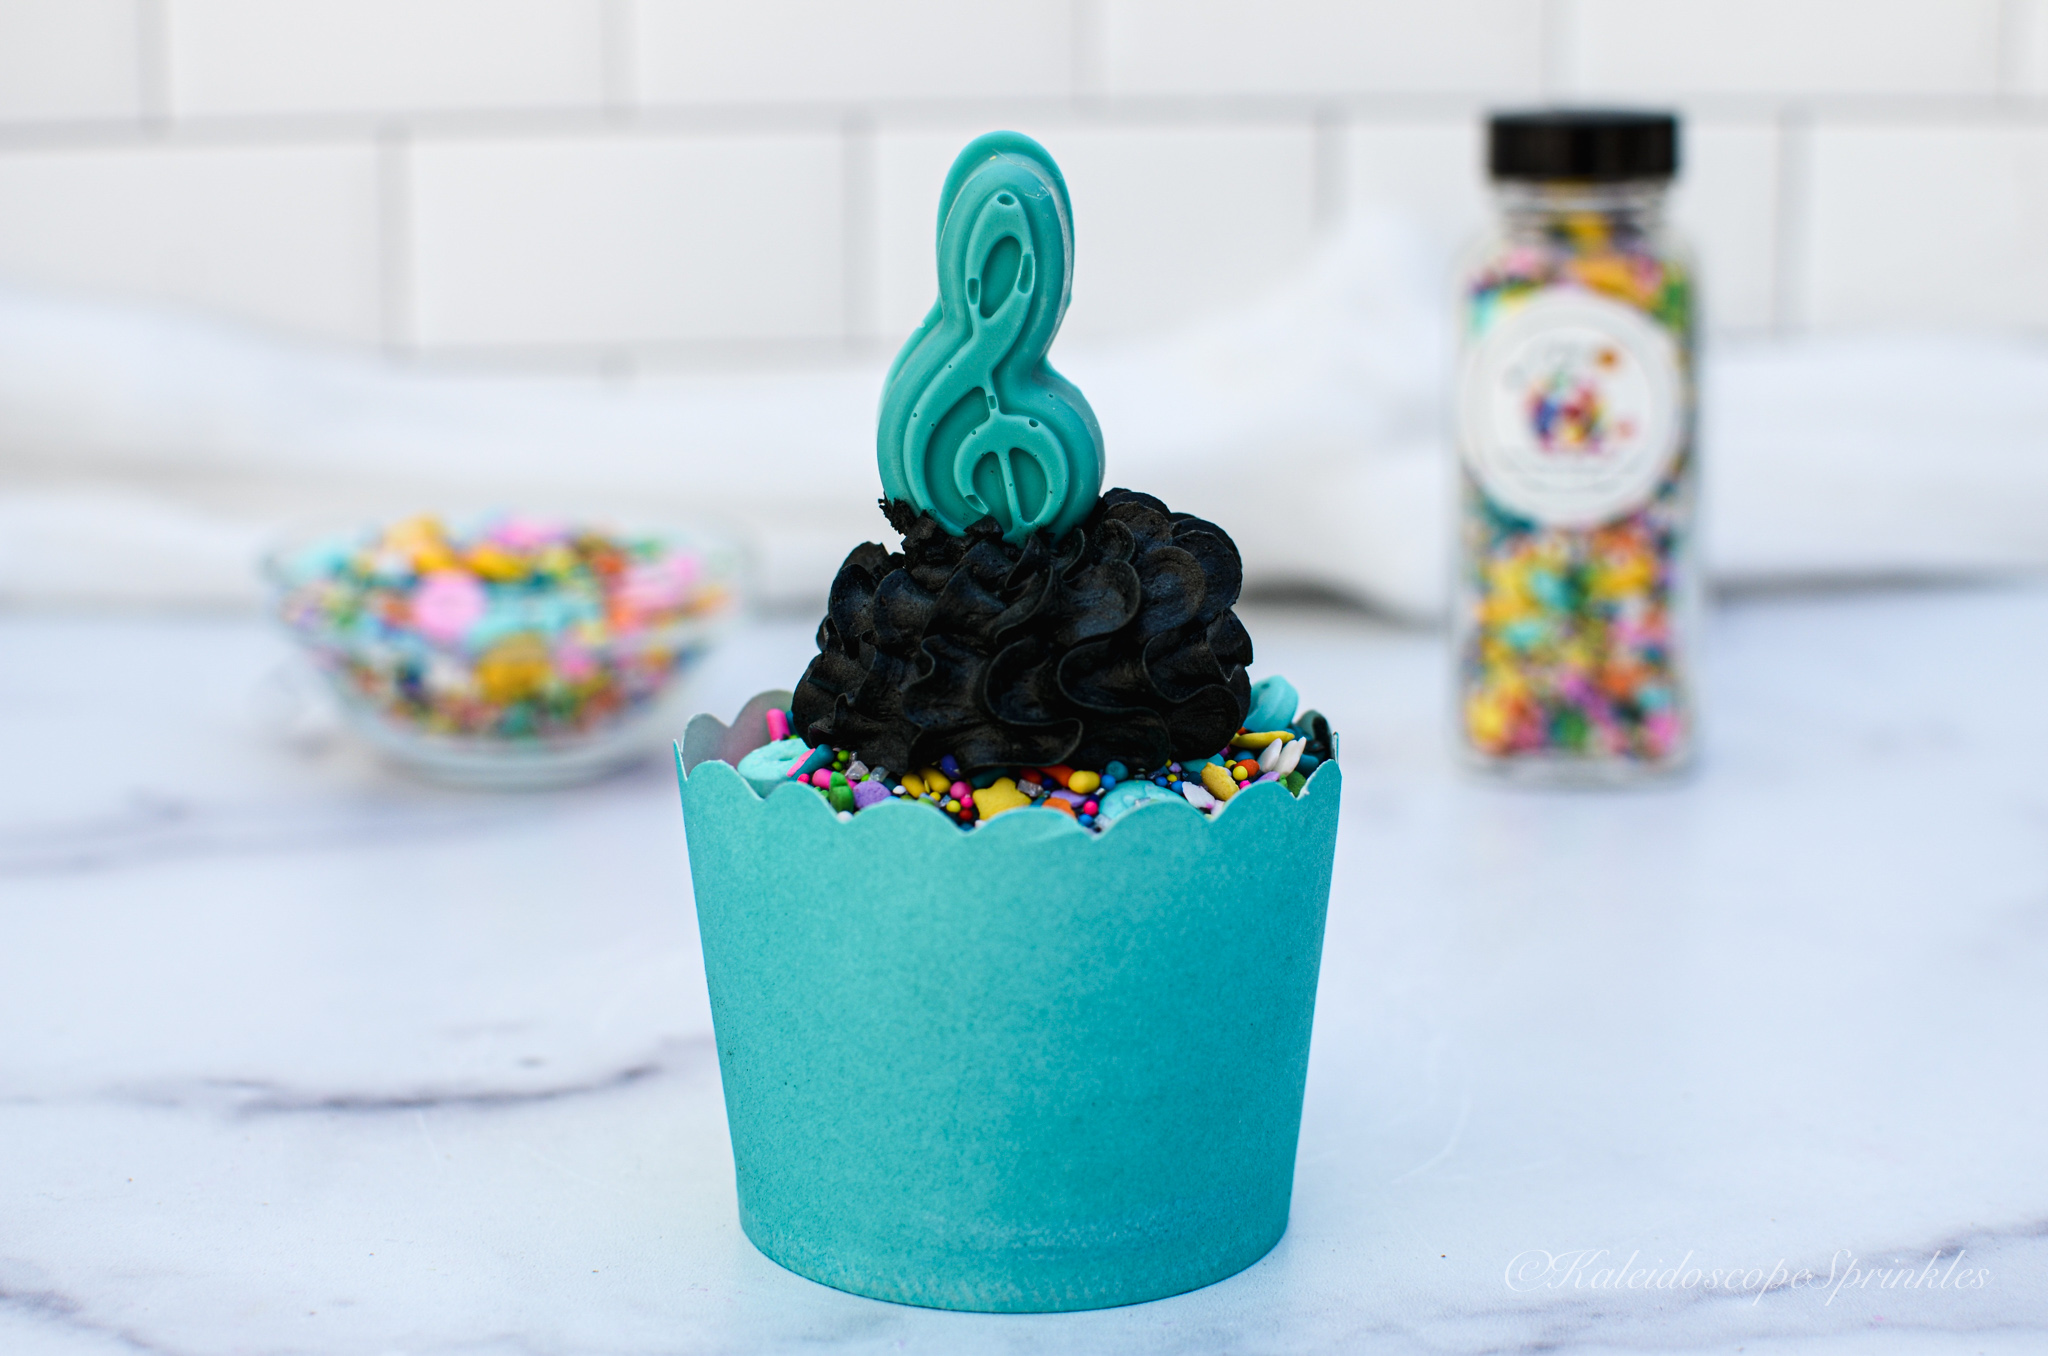
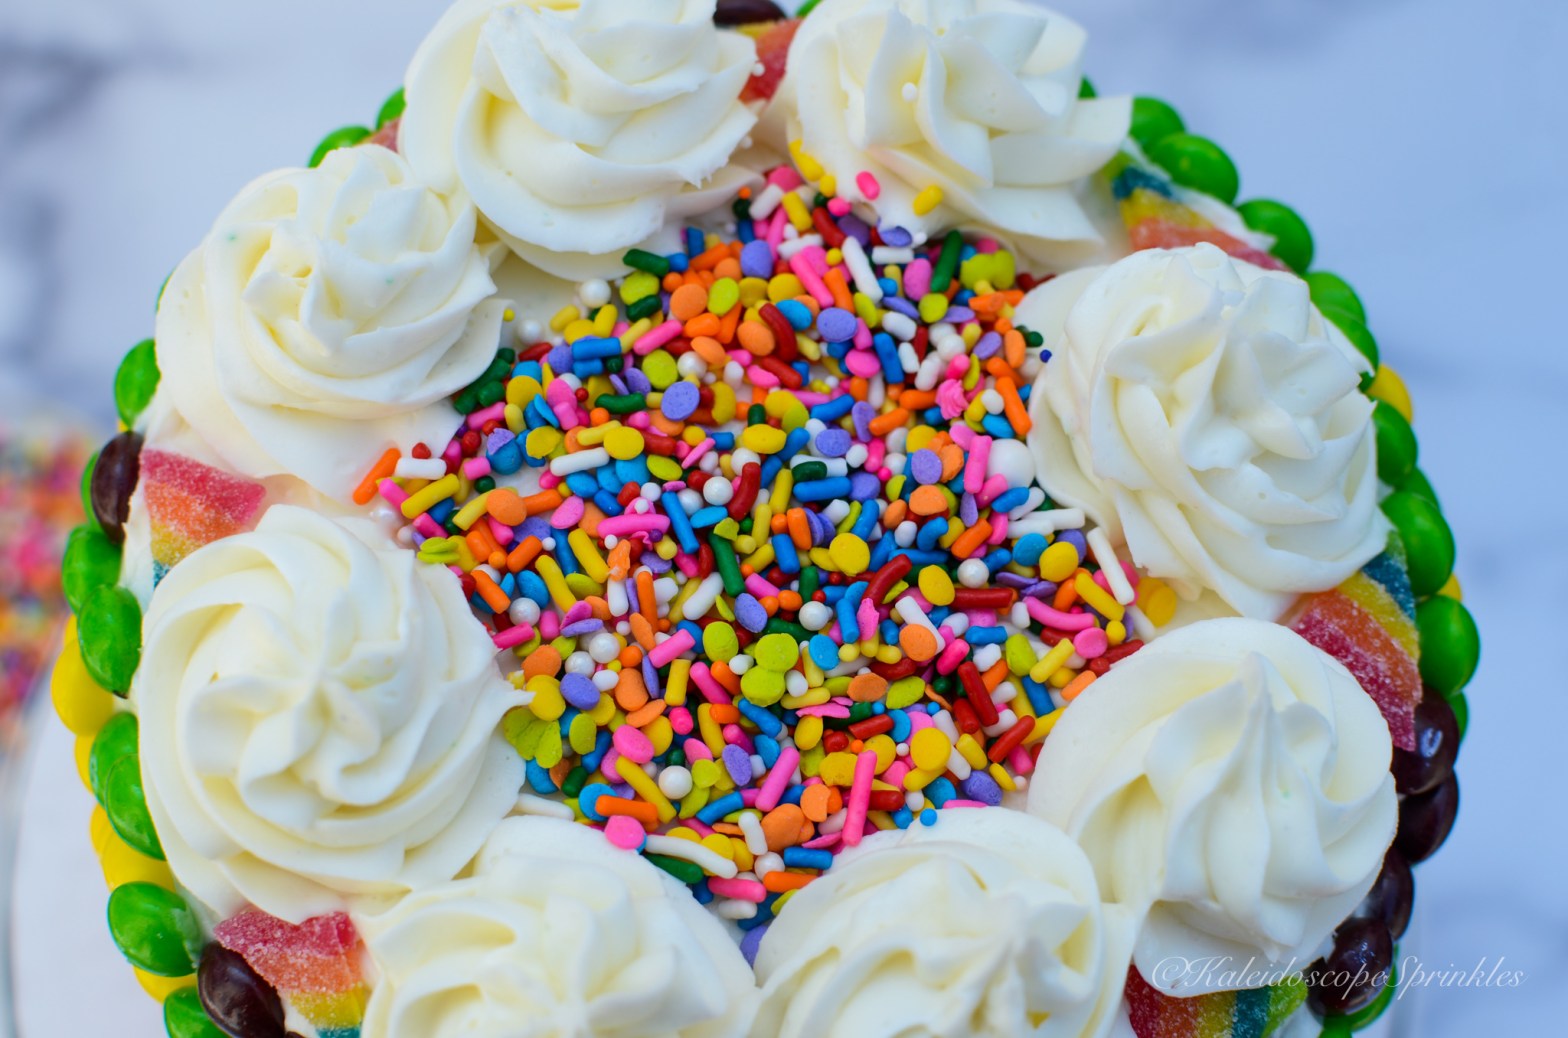
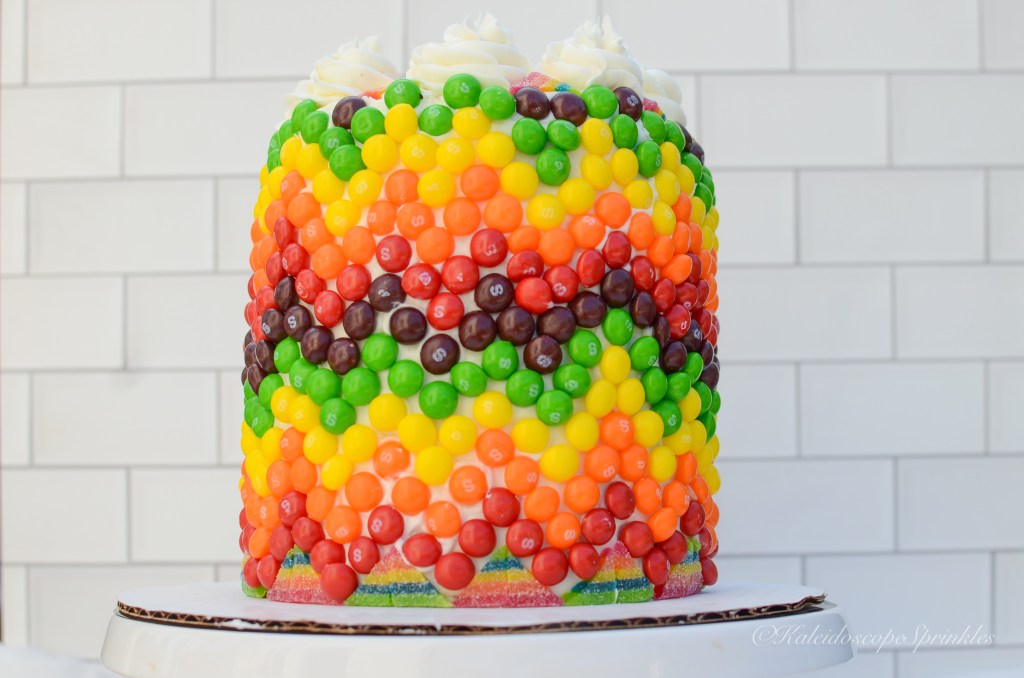
I made this delicious Pineapple Right-Side up Cake for Kobe’s birthday cake. This four layer pineapple cake is filled with a delicious fresh pineapple filling and frosted with a tangy yet sweet cream cheese filling. I decorated this cake in stars representing every year that Kobe shined on this planet. The yellow stars serve as the first half, ‘#8’ of Mamba’s career. The purple stars of course serve as the second half of Kobe’s career, ‘#24.’ The five sparkly balls on top of the cake covered in Kaleidoscope Sprinkles Cosmic Shimmers, embody Kobe’s championships. I then covered the remaining top of the cake in Black Mamba Sprinkle Mix.

This Kobe Day I ask that you consider how do you love and how do you create to inspire? Also examine what do you want your legacy to be? Kobe has shown us that life is way too short to not live our daily legacies. Happy KOBE Day!

Complete recipe and decorating video below.

KOBE Day 2022 Pineapple Right-Side up Cake

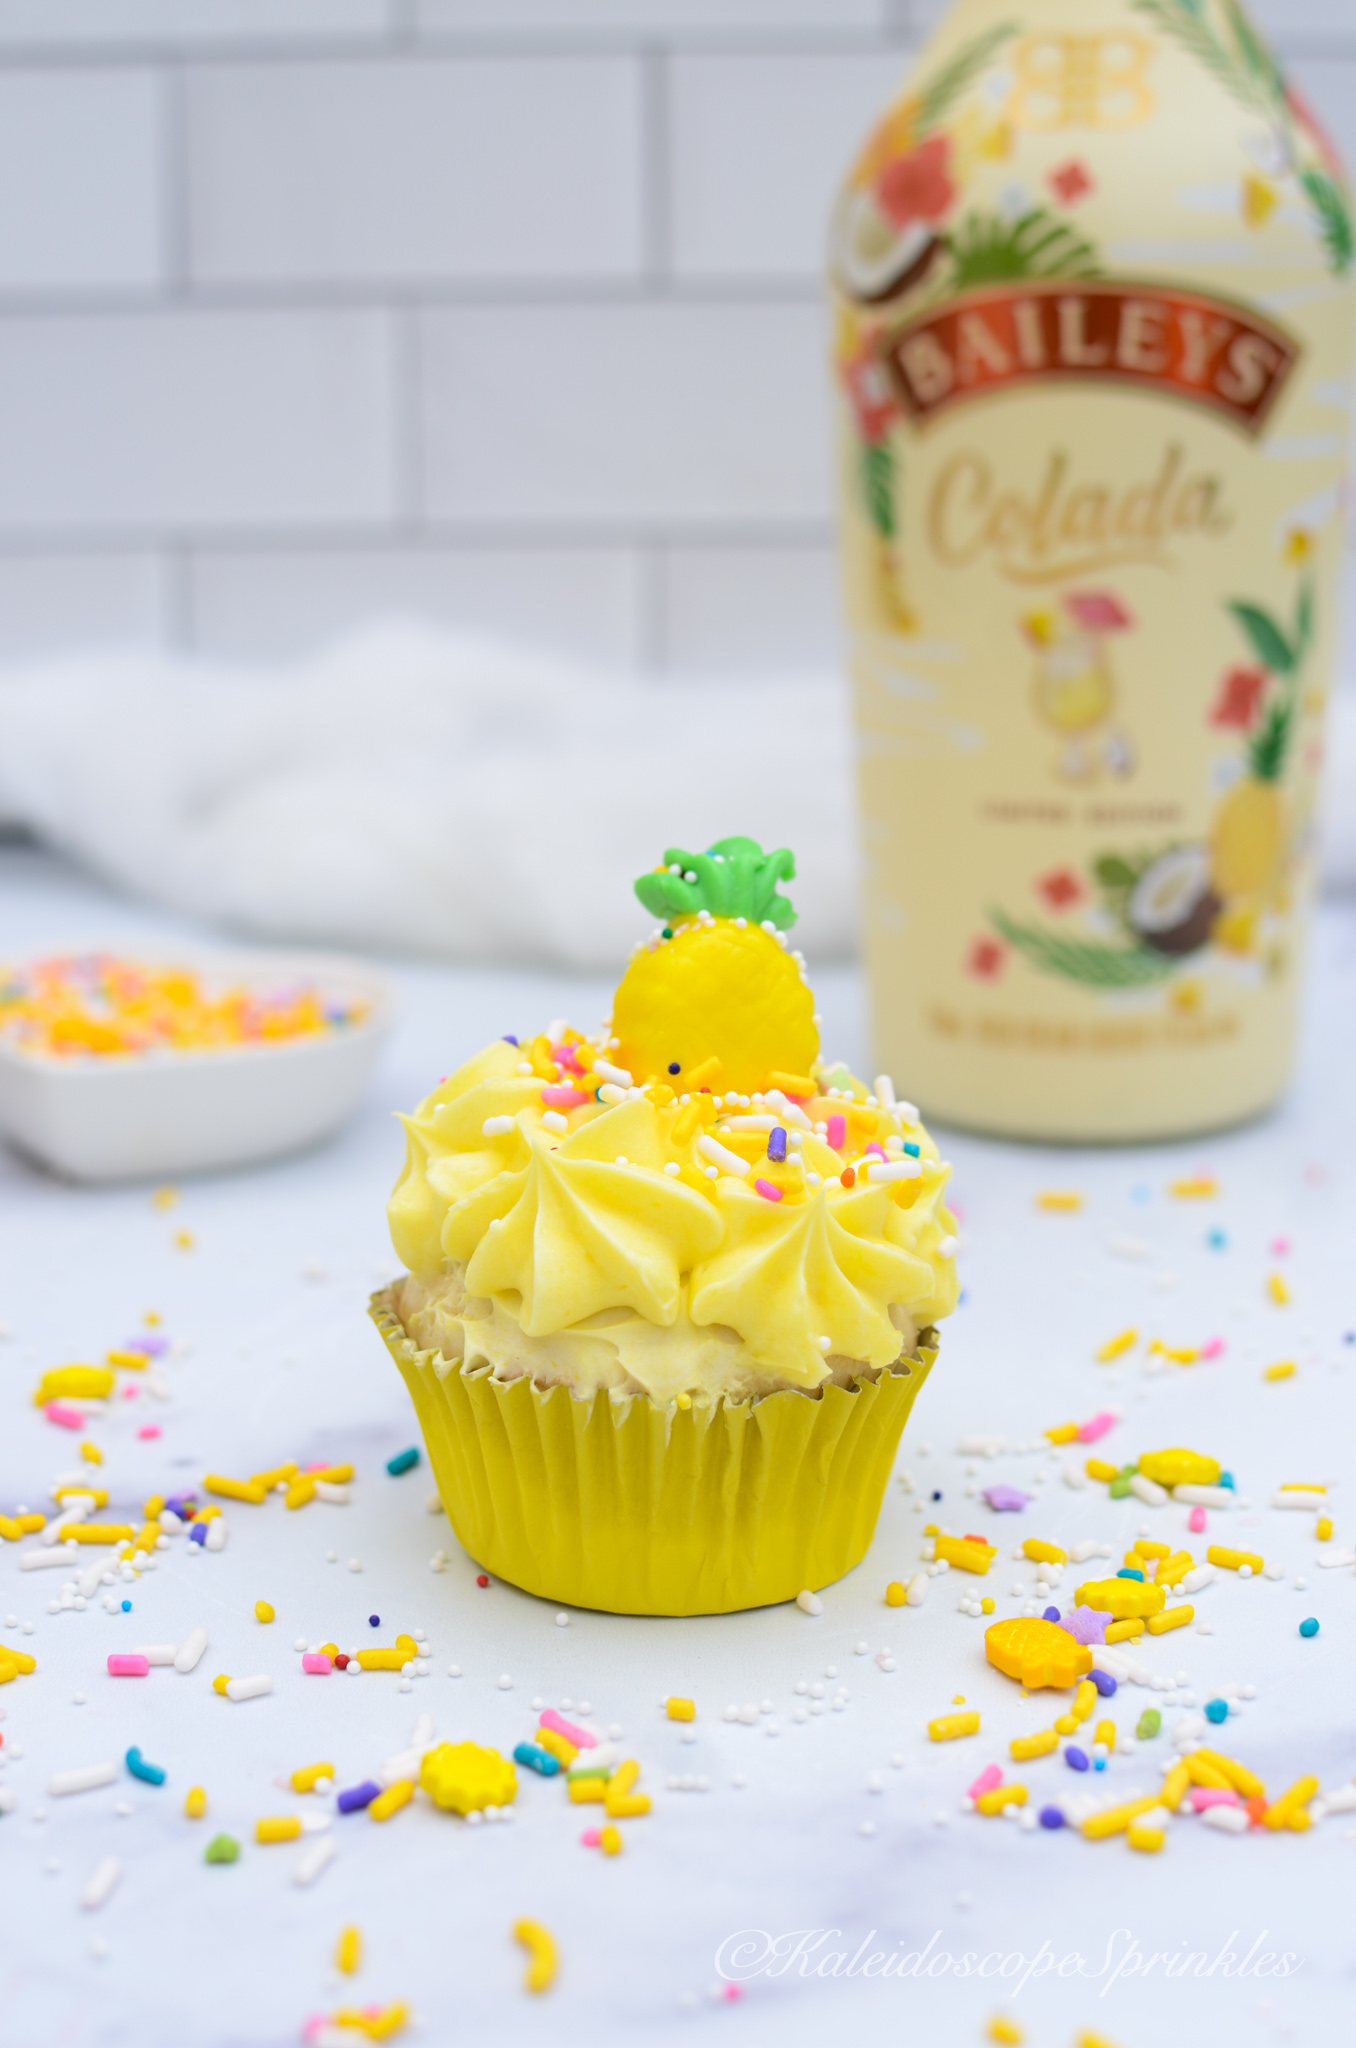
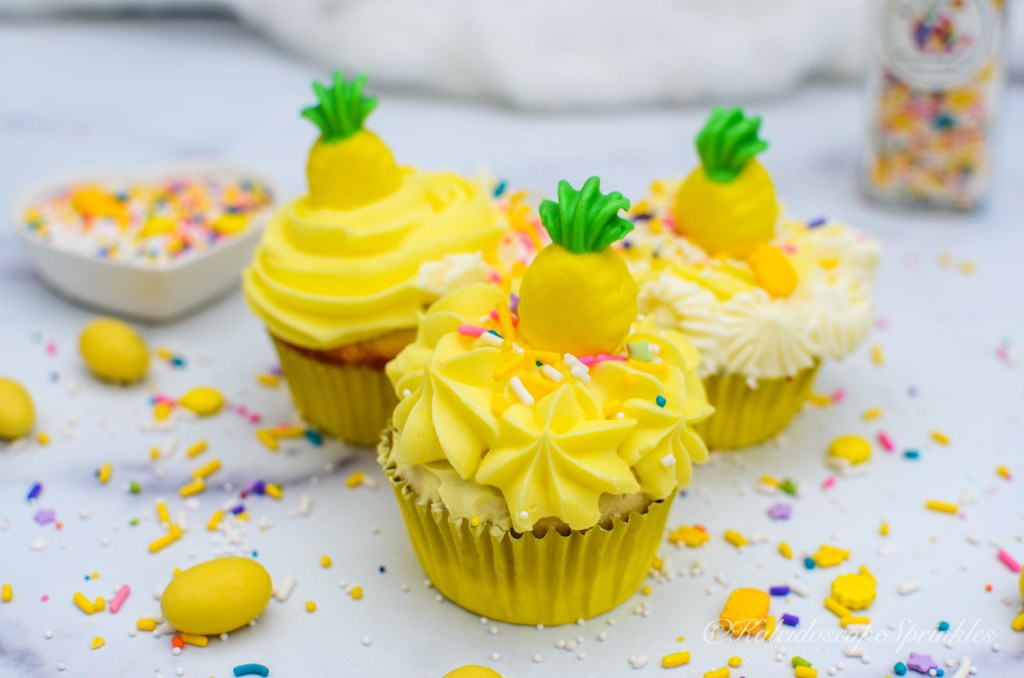
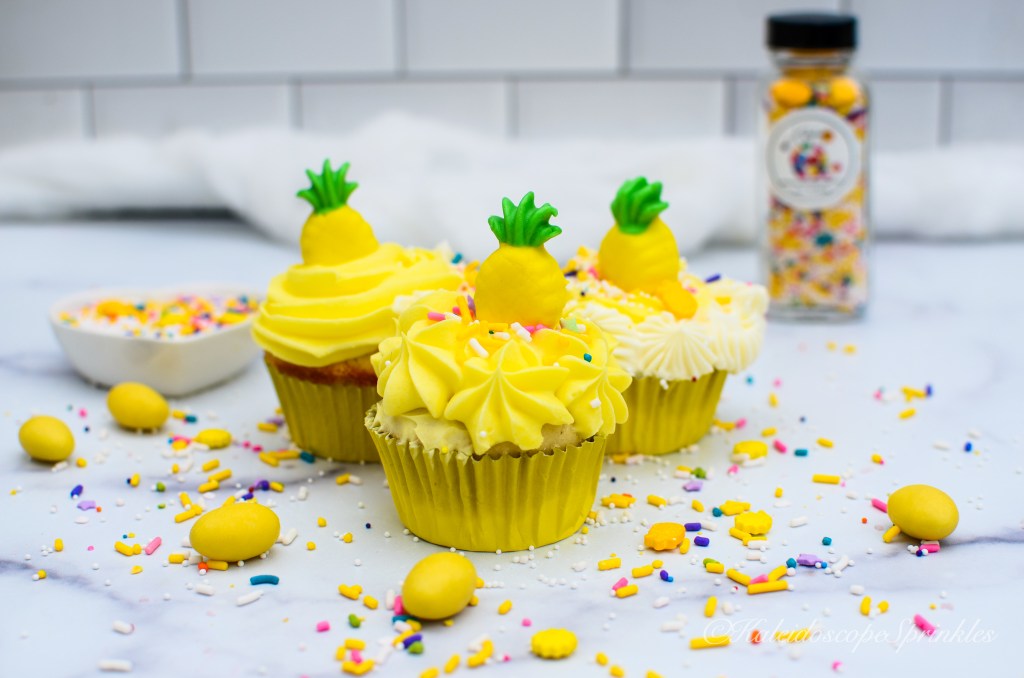
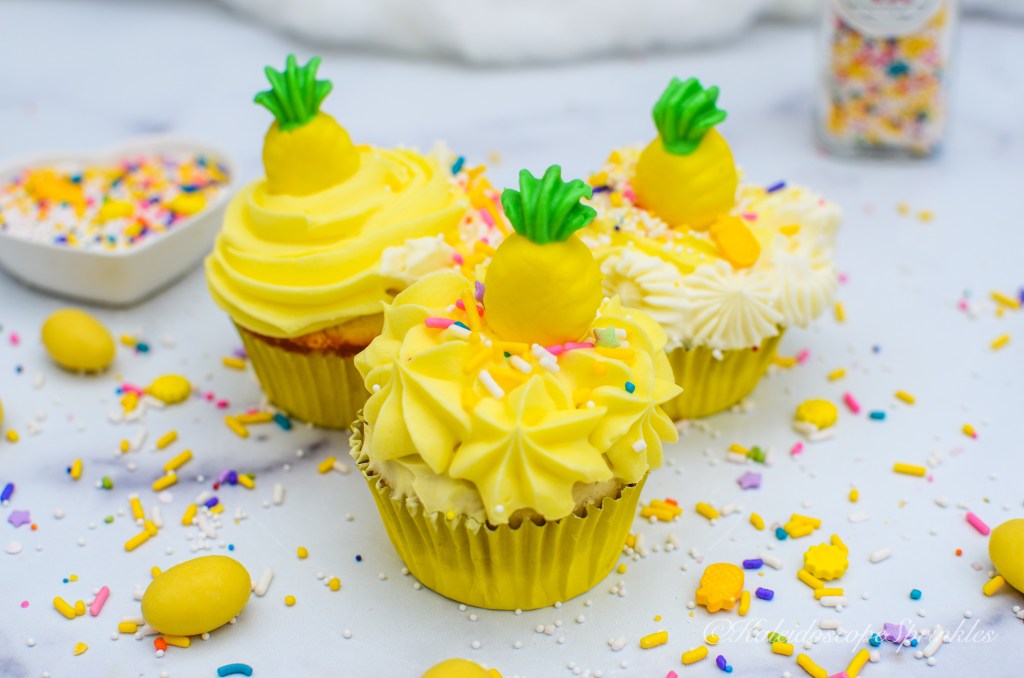
Make two 8 or 9″ cakes, four 6″ cakes or 24 cupcakes.

Ingredients

Pineapple Cake:

3 cups all purpose flour

1 ½ tsp. baking powder

½ tsp. salt

1 cup of butter, unsalted

1 cup of granulated sugar

4 large eggs, room temperature

1 tsp. vanilla extract

1 cup pineapple juice

Pineapple Filling:

20 oz. crushed pineapples with juice

1 cup brown sugar, lightly packed

1 tsp. vanilla extract

½ tsp. salt

¼ tsp. ground ginger

Cream Cheese Frosting:

12 oz. of reduced fat cream cheese

½ cup of butter

3 1/2- 4 cups of confectioners sugar

2 tsp of vanilla extract

Cosmic Shimmers in Lemon, for decorating (optional)

Black Mamba Sprinkle Mix, for decorating (optional)

Fondant, for decorating (optional)

Food gel from Deco Pac for colors (optional)

Directions

Preheat oven to 350F

Grease and flour cake pans.

In a medium sized mixing bowl mix together flour, baking powder and salt. Set aside

In a large bowl or using a stand mixer cream butter and sugar together. Beat on medium speed until the mixture is light and fluffy. Add eggs one at a time to the mixture. Add vanilla extract. Slowly add the flour mixture one third at a time, alternating with pineapple juice. After each addition, be sure to scrape the sides of the bowl. Mix batter until fully combined but be careful not to over mix.

Transfer batter to the cake pans and smooth batter evenly in the pans. Bake cakes for approximately 20-22 minutes until toothpick or cake tester comes out clean. Place cakes onto cake rack and allow to cool completely to room temperature.

While cake is baking make the pineapple filling and cream cheese frosting.

For pineapple filling: Add crushed pineapple and juice into a large saucepan. Add brown sugar, salt and ginger. Stir everything together and allow mixture to simmer on low-medium heat. Cook filling down until reduced by half and juice can coat back of spoon. Allow filling to cool to room temperature. Use hand mixer or food processor to blend mixture into smooth/ slightly chunky spreadable mixture. Set aside.

For cream cheese frosting. In a large bowl, or stand mixer, whisk together cream cheese and butter. Slowly add confectioner’s sugar using mixer on low speed until frosting is smooth. Add vanilla extract. Whisk frosting on medium-high speed until vanilla extract combined and frosting is light and fluffy.

Frost cakes with cream frosting. Decorate with fondant and Sprinkles.

Devour and Enjoy!

OOTD: 90s Renaissance

I posted on my social media a few weeks ago that it is a known fact that fashion repeats itself every 30 years. That means that we are currently in a 90s fashion renaissance. I recently started re-watching A Different World in the mornings when I work out. This series has served as a great reference to all the fashion inspiration the 1990s brought us. The structured suits, oversized pants and jackets, belts, crop tops, biker shorts, bold prints, slip dresses, etc. I especially love all the color blocking in the 90s, (ie. Cross Colours) which is a reference to the 1960s mod fashion.

This summer I have been going hard on all the 1990s fashion since I was definitely too young to rock some attire properly. I decided to piece together one of my favorite thrift store finds with some other ensemble pieces to create this fabulous casual fashion outfit.

See the details on this outfit below

90s renaissance

What I wore

Under the sea blazer- thrifted (Purchase similar find here)

Patchwork jeans- KUT from the Cloth (Purchase similar here)

Crop top- BP at Nordstorm (Purchase here)

Heels- Vince Camuto (Purchase here)

Phone holder bag- Dior (Purchase similar here)

Hair- Boholocs (Purchase here) *Black Owned

Music Festival Macarons

Summer is steadily winding down and finally coming to a close. As a lover of pumpkin spice and everything nice, I am ecstatic to see fall roll on through. Before we officially call it quits on summer, I had to address another important component of the season for me.

In the summer, the warm weather drives me and most people outside for activities. In the summer I especially love outdoor movies, picnics, brunches, barbecues, rooftop and day parties. The most important experiences of summer above all are the music festivals. Summer is simultaneous for music festival season and this year served as a rebirth for most major music venues. I was super excited after a two year hiatus to return to music festival season. Nothing beats (pun intended) being outside with fellow music lovers in warm weather dancing and vibing out.

In the summer there are many popular festivals across the globe. I appreciate that music festivals try and incorporate a variety of cuisines to suite different tastes. I have been to a few different festivals internationally and had the chance to enjoy food from the South to Singapore. Even though there is so much food to choose from at these fun-filled festivals, I never can seem to find the one thing I’m looking for.

Macarons are the missing piece to a perfect festival cuisine. These French invented cookies are super flavorful and colorful. These naturally light, gluten-free cookies would be the best accompaniment and contrast to all the heavy and probably greasy food that is consumed during the day. My summer sweet tooth has found ice cream, cupcakes, dessert empanadas, etc. to munch on in between music sets, but never macarons. Since I have not been able to find any of these French fantasies during music festivals, I decided to make my own to enjoy. I made the decision to make these macarons even more special by combining two desserts into one. These Music Festival Macarons are cotton candy flavored and chromatic. I took these cookies even further with flavor by decorating them with Kaleidoscope Sprinkles Cotton Candy flavored Sprinkle Mix.

This macaron recipe is the classic French style and is easy to make using a stand mixer and a kitchen scale. I absolutely loved how these macarons tasted and looked once they were finally completed.

You can find the complete recipe and step by step video below.

Music Festival Macarons, Step by Step video

Recipe adapted from La Cuisine Paris

Makes about 20-30 cookies

Ingredients

French Macarons:

90g ground almonds

75g egg whites

50g granulated sugar

135g confectioners sugar

¼ tsp. cream of tartar

1 tsp. cotton candy flavoring (I got mine from Michaels)

Buttercream:

½ cup (1 stick) unsalted butter, at room temperature

2 cups confectioners’ sugar

2 tbsp. heavy cream, at room temperature

½ tsp. vanilla extract

½. tsp. cotton candy flavoring

pinch salt

Cotton Candy flavored Sprinkle Mix, for decoration (optional)

Pink food coloring (optional)

Blue food coloring (optional)

Directions

Preheat oven to 160C or 320F.

For macarons: Sift the ground almonds into a medium mixing bowl. Set aside.

Measure out egg whites into clean mixing bowl. Using hand or stand mixer whisk attachment, start whipping egg whites on medium speed. Slowly start to add granulated sugar one spoonful at a time.

Gradually increase speed, slowly add the confectioners sugar one spoonful at a time. Continue to whisk egg whites until they form glossy stiff peaks and the sugar is dissolved. (Approximately 10-15 minutes). Add flavoring.

Carefully fold the ground almonds into the meringue one half at a time using a spatula. Be careful not to over mix.

Divide macaron mixture into two bowls. Add food coloring into each bowl. Carefully fold in coloring to the macaron mixture until even. Be careful not to over mix.

Put the mixture into a pastry bag. Place parchment paper on baking sheet. Pipe and form small even similar sized rounds on the parchment paper. Allow macarons to. rest on the counter for 15 minutes. Bake at 160C or 340F for approximately 12 minutes. Allow macarons to completely cool on cooling rack. Once completely cooled, remove from parchment paper. (Cookies should come off paper easily if cooked enough and completely cooled.)

While cookies are baking make buttercream frosting.

For frosting, in a medium bowl, or stand mixer, whisk butter until light and fluffy. Slowly add confectioner’s sugar using mixer on low speed until frosting is smooth. Add heavy cream. Add vanilla extract. Add cotton candy flavoring. Add salt. Add food coloring (optional). Whisk frosting on medium-high speed until combined and frosting is light and fluffy.

Pipe buttercream onto macarons and sandwich cookies together. Roll macarons in Cotton Candy flavored Sprinkle Mix.

Devour and Enjoy!

*to make sure stiff meringues form in your recipe, make sure all your utensils are completely fatless. Wipe everything down (mixing bowls and whisk) using a paper towel and white vinegar to remove any oil from baking supplies.

No-Bake Strawberry Cheesecake

You can never have enough strawberry recipes, especially in the summertime. The berries are bountiful this time of year and I take advantage. This summer has been even hotter not by surprise, thanks to global warming. I thought that this would be a great opportunity to save the planet and scraps from our previous recipe to create something new.

The last recipe that was posted was a scrumptious Strawberry Crunch Cake. This cake, although super delicious and worth the sacrifice, required turning the oven on. The oven was needed not only to bake the cake, but also to make the yummy strawberry crunchies to top the cake. The recipe for the cake made an abundance of strawberry crunchies and I refuse to let them go to waste.

I came up with the idea of using those crunchies to make a strawberry flavored, and also perfectly textured crust for a No-Bake Strawberry Cheesecake. This is not your basic strawberry cheesecake. This cheesecake doesn’t just have strawberry flavor in the crust, it also has strawberries in every ounce of the filling. This cake is light, creamy, tangy and tasteful. This haute recipe is super simple and doesn’t require turning the oven on during these continued hot days. I also made a vegan/ plant-based recipe if you want to make your cheesecake even lighter. I decorated the cheesecake using the same Kaleidoscope Sprinkles mix combination from the Strawberry Crunch Cake recipe. I love how the cheesecake turned out.

You can find both cheesecake recipes and the video below.

No-Bake Strawberry Cheesecake step by step

Use 8 or 9 inch springform pan for recipe

Ingredients

Strawberry filling:

2 cups heavy whipping cream, very cold

3- 8oz. packages of cream cheese, room temperature

2 tbsp. confectioners sugar

1 cup granulated sugar

¾ cup (approximately 2 oz.) freeze dried strawberries, ground to fine powder

2 tbsp. strawberry gelatin

2 tsp. lemon juice

1 tsp. vanilla extract

1 tsp. strawberry extract, (optional)

Strawberry Crust:

2 cups of strawberry crunchies

6 oz. unsalted butter, melted

AKA Sprinkle Mix, for decorating (optional)

DST Sprinkle Mix, for decorating (optional)

Extra whipping cream and strawberries, for decorating (optional)

No-Bake Strawberry Cheesecake

Directions

For the crust: In a small bowl, mix together strawberry crunchies and butter until combined. Press strawberry crust in 8 or 9 inch springform pan. Use back of measuring cup to tightly pack crust into pan. Place crust in the refrigerator for 10-15 minutes and allow to set.

Make filling by placing very cold whipping cream into large bowl. Whip cream on medium speed for approximately 5 minutes until soft peaks form. Add confections sugar to whipped cream. Turn up speed to high and whip cream into sift peaks. Set heavy cream aside and place into refrigerator while you finish making remainder of the cream cheese filling.

Using another large bowl whip together cream cheese and granulated sugar on medium speed until smooth and creamy. Using a food processor, add freeze dried strawberries and grind into a fine powder. Add strawberry powder, gelatin, lemon juice and extracts. Whip on medium speed until cream cheese mixture is combined.

Take whipped cream out of the refrigerator. Using a rubber spatula, add half of the cream cheese mixture to the whipped cream and fold in gently until combined. Add the remaining half of the cream cheese mixture to the whipped cream. Continue to gently fold together until cream cheese mixture. is fully combined. Combine slowly as you don’t want to deflate all the air out the whipped cream.

Take crust out the refrigerator and spread filling onto the crust. Use spatula to smooth down the top of the cheesecake. Cover cheesecake tightly with plastic wrap or aluminum foil and refrigerate for at least 6-8 hours and up to 2 days. For best results, refrigerate overnight.

Once ready to serve, use paring/ small knife to loosen cheesecake from rim of springform pan. Cut cheesecake into desired slices.

Devour and Enjoy!

*For a plant based/ vegan recipe: Use vegan butter or coconut oil to make your strawberry crunchies, following the same directions. For cheesecake filling: use 2 cups of plant based cream, 3- 8oz containers of plant based cream cheese, 2 tbsp. confectioners sugar, 1/2 cup granulated sugar, ¾ cup (approximately 2 oz.) freeze dried strawberries, ground to fine powder, 1 tsp. vanilla extract, 2 tsp. lemon juice and one serving (I used 2 scoops of Orgain Strawberry & Cream powder) plant based strawberry flavored protein powder. Follow same directions above for filling. Refrigerate for at least 6-8 hours. Better if refrigerated overnight. Top with plant based whipped cream and fresh berries.

Devour and Enjoy!

Strawberry Crunch Cake

I have always appreciated the season of summer. Summer to me means annually indulging in fresh and abundant produce. From the fresh vegetables and array of fruits, I definitely keep my plate colorful during this time of the year. By now I’ve expressed my love for my favorite fruit, watermelon, several times. Although I love a good melon, it is not the only fruit that gets my attention.

Strawberries are in second place when it comes my favorite produce confessionals. I have always loved a good, sweet, ruby red, perfectly ripe strawberry. Strawberries, although small in stature stand out when it comes to fruit. When I was in elementary school, I wrote a short story on a strawberry character for an assignment. The point of the story was that this cute strawberry finally recognized and understood her uniqueness and wore her seeds on the outside proudly, unlike her other fruit friends. My teacher loved it and ate the story up (pun intended).

Strawberries are tasty on their own, fresh out the carton, but even better when baked. I have created several strawberry recipes because magic happens when these delicious berries are heated. From shortcakes, cupcakes, biscuits, cobblers and more, I usually find ways to incorporate strawberries. This summer, I decided to take on another recipe and make an exquisite Strawberry Crunch Cake. I have always enjoyed strawberry cake, but why not make it better with more texture and flavor. I made some homemade mouthwatering strawberry crunchies for the outside of the cake. I also decorated the cake using Kaleidoscope Sprinkles. I combined the AKA and DST Sprinkle Mixes to make the perfect strawberry blend of sprinkles. I wanted this cake to be bursting with strawberries, so I decorated the inside and outside of the cake. I love how the cake turned out. This Strawberry Crunch Cake is definitely tastefully and visually gratifying.

You can find the complete recipe and step by step video below.

Strawberry Crunch Cake

Ingredients

Cake:

3 cup flour, divided

2 ½ tsp. baking powder

½ tsp. salt

¾ cup unsalted butter, room temperature

1 ½ cup granulated sugar

3 eggs, room temperature

1 tsp. vanilla

1 tsp. strawberry flavor (I purchased mine from Michaels)

1 cup buttermilk

1 cup strawberry purée

Strawberry Crunchies:

1 cup flour, divided

½ cup granulated sugar, divided

½ cup (8 tbsp.) salted butter, divided and softened

¾ cup (approximately 2 oz.) freeze dried strawberries, ground to fine powder

½ tsp. vanilla extract

Glaze:

1 cup confectioners sugar

2-3 tbsp. heavy cream or strawberry cream liqueur (Optional. I used Baileys)

pinch of salt

Red food coloring

Green food coloring

AKA Kaleidoscope Sprinkles, for decoration (optional)

DST Kaleidoscope Sprinkles, for decoration (optional)

Directions

Preheat oven to 350F.

Grease and flour bundt and strawberry cake pans.

Make the crunches first. Line two cookie sheets with parchment paper or a silicone baking mat. Set aside.

Using two small bowls, add ½ cup of flour to each bowl. Add ¼ cup of sugar to each bowl.

Using a food processor, add freeze dried strawberries and grind into a fine powder. Add powder to one of the small bowls for strawberries crunchies.

Stir both bowls well to combine. Add 4-5 tbsp of butter to bowl for the strawberry crunchies. Add 3 tbsp. of butter to the small bowl for the vanilla crunchies. Add vanilla extract.

Using fork, combine butter into each mixture until dough combines together and forms crumbles.

Lay each crumble evenly onto separate cookie sheets. Bake each of the crumbles for approximately 5-10 minutes until slightly golden brown.

Let each crumble cool completely on cookie sheets. Once cooled, break crumble into smaller bits using your hands (if needed).

Combine both flavored crunchies into one bowl and set aside. *

For the cake:

In a medium sized mixing bowl mix together 2 ½ cups flour, baking powder, and salt. Set aside.

Using a food processor or blender, beat strawberries (frozen work best) until pureed, consistency of baby food. Set aside.

In a large bowl add butter, sugar to the mixture and continue to mix until creamed together. Add eggs to mixer. Beat on medium speed until the mixture is fully combined. Add vanilla extract. Add strawberry flavor.** Slowly add the flour mixture one third at a time with half of buttermilk. Beginning and ending with flour mixture. Mix until fully combined but be careful not to over mix.

**(If you don’t plan to make cake strawberries for inside the cake. Add strawberry pureé to large bowl. Add additional ½ cup of flour to flour mixture. Slowly add the flour mixture one third at a time with half of buttermilk. Beginning and ending with flour mixture. Mix until fully combined but be careful not to over mix. Transfer batter to the bundt cake pan and smooth batter until even in the pan. Hit cake pan onto the counter a few times to knock out air bubbles. Bake cake for approximately 40-45 minutes until toothpick or cake tester comes out clean. )

To make cake strawberries:

Using medium bowl, add 2 cups of cake batter to bowl. Add strawberry purée, any remaining strawberry powder and red food coloring to bowl. Mix until combined. Fold in additional ½ cup of flour. Combine until batter is thoroughly mixed but not over mixed. Set aside.

In a small bowl, add 1 cup of cake batter to bowl. Add green food coloring. Mix until combined and desired color is achieved.

Using piping bag or small plastic bag, pipe green cake batter into strawberry cake pan. Place pan in freezer for 10 minutes to set cake batter. Once batter has set, spoon strawberry cake batter on top of green cake batter.

Bake strawberry cakes for approximately 8-10 mins. (Do not bake cakes completely). Allow cakes to cool in pan until slight above room temperature.

Add remaining strawberry cake batter to regular batter into large bowl. Fold batters together until combined.

Pour third of cake batter into bundt pan. Remove strawberry cakes from their pan. Place strawberry cakes upside down into the bundt cake pan. Cover cakes with the remaining batter. Bake cake for approximately 30- 35 mins. until all the cake has set and tester comes out clean.

While cake is baking make the glaze. In a medium sized bowl whisk together confectioners sugar, cream/ liqueur and salt until smooth. (Glaze should be thick enough to coat back of a spoon.)

Place cake onto cake rack and allow to cool completely. Invert cake onto cake plate or board. Spoon glaze onto cake.

Cover cake with strawberry crunchies and Kaleidoscope Sprinkles.

Devour and Enjoy!

* This strawberry crunchies recipe makes an abundance. You may use the additional crumbles on top of your ice cream or yogurt bowls. You may use them to make crunch muffins, donuts or a great topping for any fruit crumble. You may also eat them with fresh fruit for a light snack or dessert.

Like my cake pans?

Click here to purchase Bundt or strawberry pan.

OOTD: Paris Fashion Week in LA

It’s Paris Fashion Week! You all know that I absolutely adore both Paris and fashion! Sadly, I have yet to attend Fashion Week in my favorite city. I would love to be invited and sit at a couture fashion show. It’s actually one of my lifetime goals that I am continually trying to bring to fruition. Fashion week for fall/winter season happens in the heat of summer, so the apparel must be governed accordingly.

This year since I was stuck stateside yet again for the shows, I decided to create Paris Fashion Week here in Los Angeles.

Paris fashion here in LA!

What I Wore

Hot pink dress- @asos (Purchase similar here) and (here)

Pink Clutch- @dior (Purchase here)

Pink leopard print shoes- @lagence (purchase here)

Champagne earrings- @amazon (purchase here)

Hair- @boholocs *Black owned* (purchase here)

Dior bag unboxing

L’agence shoe unboxing

Piña Colada Day

Summer, summer, summertime!

We have finally made it to the second half of 2022. Month number seven means we are in the full swing of summer. This season brings us the hottest and longest day of the year with Summer Solstice. All this sunshine provides more opportunities to be outside, show some skin and burn some calories. During this season you can usually find me in somebody’s pool or poolside with a drink in my hand.

I love a good summer drink. A lovely warm evening basking in my backyard with a drink in my hand is bliss. I love that summertime comes with its own cocktails. I am usually a “rosé all day” kinda gal, but this summer, I decided to add a little more flavor. July 10th is National Piña Colada Day, which serves as motivation for a new recipe.

I adore a good tropical cocktail. Last summer I actually discovered a new cocktail while I was perusing the aisles at BevMo. I purchased this Colada liqueur, threw it on some ice and had a wonderful evening swinging in my hammock. This year I wanted to try and use this liqueur to serve piña coladas in a new way. I took my classic cupcake and buttercream recipes and infused this delicious drink inside. I decorated these cupcakes using some fondant pineapples and Kaleidoscope Sprinkles. The cupcakes turned out sizzling and sensational.

You can find the complete recipe and decorating video below.

Piña Colada cupcake decorating

(Makes 12 cupcakes)

Ingredients

Cupcakes:

1 ½ cups all purpose flour

¾ tsp. baking powder

¼. tsp. salt

½ cup (1 stick) unsalted butter

¾ cup sugar

2 eggs, room temperature

½ cup buttermilk

½ cup Colada liqueur ( I used Bailey’s)

Buttercream Frosting:

1 cup unsalted butter, at room temperature

4 cups confectioners sugar

¼ cup Colada liqueur

1 tsp. vanilla extract

¼ tsp. salt

Directions

Preheat oven to 350F. Line cupcake tin with liners.

In a medium sized bowl whisk together flour, baking powder and salt. Whisk until all ingredients are combined and set bowl aside.

In a separate large bowl using either a stand or hand mixer cream together butter and granulated sugar until light and fluffy and doubled in sized. (Approximately 3-5 minutes). Add eggs to mixture one at a time. Add buttermilk and liqueur. Add flour mixture and stir until combined. Be careful not to over mix.

Using an ice cream scoop place cupcake batter into cupcake tins. Bake cupcakes at 350F for approximately 22-25 minutes until tester comes out clean.

Allow cupcakes to completely cool.

While cake is baking make the buttercream frosting. In a large bowl, or stand mixer, whisk together butter. Slowly add confectioner’s sugar using mixer on low speed until frosting is smooth. Add Colada liqueur. Add vanilla extract. Add salt. Whisk frosting on medium-high speed until vanilla extract combined and frosting is light and fluffy.

Add sprinkles and decorations.

Devour and enjoy!

INDEPENDENT Day Cereal Bars

Here we are in month seven of what feels like an accelerated year. It may be the fact that I keep myself so occupied, but I feel like 2021 is in warp speed. Between CCC, Kaleidoscope Sprinkles (my Sprinkle Mix company), my travel blog and being a full-time physician it seems like these days are flying by. I hope every one had a chance to celebrate and enjoy their Juneteenth. (Check out how I celebrated here). Juneteenth is the time where I and my ancestors celebrate our true emancipation.


July 4th doesn’t hold the same weight to me or my community, so I decided to change its name and its meaning. In the Sex and the City episode ‘A Women’s Right to Shoes,’ Carrie addresses the realization that single independent women don’t get enough reasons to celebrate. This year I came up with the concept of celebrating my fabulous independent self from here on out on Fourth of July. I honestly work extremely hard and deserve to celebrate myself as should you!


For my Independent Day I am doing whatever I want and eating whatever I want with no shame. I decided I wanted to make some nostalgic cereal bars but upgraded like myself. These cereals bars are made with delicious brown butter and one of my favorite childhood cereals. I then topped the cereal bars off with candy melts and of course Kaleidoscope Sprinkles CREED Sprinkle Mix. I promise you these cereal bars are worthy of their own celebration.


Check out the recipe and step by step video below.

Step by step video

Ingredients
1 cup unsalted butter

10 oz. marshmallows

6 cups of crispy rice cereal

5 cups of crunch berry flavored cereal

1 tsp. vanilla extract

½ tsp. salt


Candy melts

CREED Sprinkle Mix


Directions
In a large saucepan, melt butter over medium-low heat. Butter will melt, then foam, then turn clear golden and finally start to turn brown and smell nutty. Stir butter frequently, scraping up any bits from the bottom as you do. Be sure to continue to keep your eye on it because it can burn very fast!


As soon as the butter takes on a nutty brown color, turn the heat off and stir in the vanilla extract, salt and marshmallows. The residual heat from the melted butter should be enough to melt the marshmallows, but if it is not, turn heat back on low until the marshmallows are smooth and completely melted.


Remove the saucepan from the stove and transfer contents to a large bowl. Add cereal to the bowl. Fold cereal into marshmallows until combined well and all the cereal is sticky. Spread into buttered 9 x 13 x 2 baking dish. Use butter hands and press cereal bars into dish firmly and evenly into the edges and corners.


Let bars cool in refrigerator for about 45 minutes, or until completely cooled and set.
Once cereal bars have cooled, melt candy melts on stove or microwave following package directions. Drizzle candy melts onto cereal bars. Sprinkle CREED Sprinkle Mix on top of cereal bars. Cut bars into 3″ squares, make stars or eat it straight out the dish.


Devour and enjoy!!

Happy Juneteenth & Black Music Month

Juneteenth in the Black community historically has been a time for celebration. This special day has served as a community monument of freedom. For Black people in the US, Juneteenth has been a long standing tradition. I remember as a child going to parades, festivals, and of course celebrating with delicious dishes of food. This year marks the second year that Juneteenth has been recognized as a national holiday. Even though it took much longer than it should have, progress is still progress. What better way to keep the party going than with great music and a delicious dessert.

Not only do we celebrate the freedom of Blacks in June, but also the creativity of self expression through music. June also represents Black Music month. I must say 30 days is not nearly enough time to honor and appreciate the contributions of blacks to music. Music has always been a huge aspect of my life. I started playing piano as an adolescent. I then went on to play the clarinet, soprano and alto saxophone, which I still play. I also started writing and singing songs as a child and continue to do so currently. Music, especially Black music, has always been influential to every part of my life. I could not let this music fete or Juneteenth go on without a unique sweet.

In April while attending a music festival, I came across this stand out sweatshirt. The garment itself was quite bland, but what caught my eye was the message inscribed across the front. “Love Black people like you love Black music.” The message, so simple and yet so strong, spoke to me instantly. I knew at that moment that I wanted to continue to spread the words through my culinary arts. June represented the prime opportunity to pass on the message deliciously. I used Kaleidoscope Sprinkles new Sprinkle Mix, Donut-cha No No No Good and Cosmic Shimmers to decorate my amazing musical confections. I loved how the cake and cupcakes turned out.

You can find the complete recipe for the cake/ cupcakes and decorating video below.

Chocolate Cake decorating

Black Music Month cupcakes

Makes 13″ x 9″ cake or 24 cupcakes

Ingredients

Chocolate Cake: (adapted from Vintage Cakes Mississippi Mud Cupcakes recipe)

1 cup old brew coffee, heated

¾ cup Dutch cocoa powder

2 cups all purpose flour

2 cups sugar

1 tsp. baking powder

1 tsp. salt

½ tsp. baking soda

1 cup semisweet chocolate chips

2 large eggs, room temperature

½ cup Greek yogurt

½ cup milk

½ cup canola oil

2 tsp. vanilla extract

2 cups of chocolate sandwich cookies, crushed.

Buttercream Frosting:

1 cup unsalted butter, at room temperature

4 cups confectioners’ sugar

¼ cup heavy cream, at room temperature

1 ½ tsp. vanilla extract

¼ tsp. salt

Donut-cha No No Good Sprinkle Mix, for decorating (optional)

Silver Cosmic Shimmers, for decorating (optional)

Directions

Preheat oven 350F. Grease and flour cake pan or line cupcake tins.

In a small bowl, whisk hot coffee into the cocoa powder. Set aside and allow to cool.

In a large bowl, whisk or sift together flour, sugar, baking powder, salt, and baking soda until combined. Fold in chocolate chips.

In a separate medium sized bowl, whisk together eggs, yogurt, milk, oil and vanilla extract. Add in cooled cocoa mixture.

Add wet ingredients into bowl with dry ingredients. Gently stir ingredients together until just combined. Be careful not to over mix.

Fold in crushed chocolate sandwich cookies.

Pour batter evenly into cake pan. Bake cake at 350F for 25-30 mins. (Until tester comes out clean). Allow cake to cool completely

While cake is baking make buttercream frosting.

For frosting, in a large bowl, or stand mixer, whisk butter until light and fluffy. Slowly add confectioner’s sugar using mixer on low speed until frosting is smooth. Add heavy cream. Add vanilla extract. Add salt. Whisk frosting on medium-high speed until combined and frosting is light and fluffy.

Frost cake once cooled with frosting. Decorate with Sprinkles and Cosmic Shimmers (optional) .

Devour and Enjoy!

Rainbow Birthday Cake

Happy June! I am always excited to welcome the sixth month of the year with open arms. June is the halfway point of the year and serves as a point of reflection. Not only does this month mark a pivotal point in the year, it is also filled with celebrations. Of course we have Pride Month, a celebration of love and acceptance for everyone. June also is historic for Black Music month, summer solstice and more birthdays.

I, of course, am a May gemini. Would you believe that both my best friends are also Geminis and their birthdays are a day apart? My best friend, George, celebrates his special day on the 16th of this month, so I decided to make something spectacular for him.

I predetermined that this cake should be as unique and incredible as my best friend. One night a few weeks ago, while comfortably in my REM cycle, an idea came to mind. I quickly woke up from my slumber and jotted down my brainstorm and went back to sleep. Once well rested and ready I got to work on my birthday cake design.

This past weekend was the perfect opportunity to make this fabulous Rainbow Birthday Cake. This spectrum confection was made with love and of course Kaleidoscope Sprinkles for decoration. The Wizz Sprinkle Mix was the perfect Pride accessory for this cake. I enjoyed every part of making this cake for my amazing friend, so I decided to share the fun and love.

You can find the cake recipe and step by step decorating video below.

Rainbow Birthday Cake decorating video

Vanilla Cake Recipe (Makes 2 8″ or 9″ cakes, 4 6″ cakes or 24 cupcakes)

Ingredients

Cake:

1 cup butter, unsalted

2 cups sugar

3 large eggs, room temperature

1 cup buttermilk

2 tsp. vanilla extract

¼ tsp. almond extract

3 cups all-purpose flour

1 ½ tsp. baking powder

½ tsp. salt

Buttercream Frosting:

1 cup unsalted butter, at room temperature

4 cups confectioners’ sugar

¼ cup heavy cream, at room temperature

1 ½ tsp. vanilla extract

¼ tsp. salt

The Wizz Sprinkle Mix, for decorating (optional)

Food gel from Deco Pac for colors (optional)

Assorted candies

Directions

Preheat oven to 350F

Grease and flour cake pans.

In a medium sized mixing bowl mix together flour, baking powder and salt. Set aside

In a large bowl or using a stand mixer cream butter and sugar together. Beat on medium speed until the mixture is light and fluffy. Add eggs one at a time to the mixture. Add vanilla and almond extracts. Slowly add the flour mixture one third at a time, alternating with buttermilk. After each addition, be sure to scrape the sides of the bowl. Mix batter until fully combined but be careful not to over mix.

Divide cake batter evenly into six small bowls. Add food gel to each bowl and gently fold in color until evenly distributed.

Transfer batter to the cake pans and smooth batter evenly in the pans. Bake cakes for approximately 20-22 minutes until toothpick or cake tester comes out clean. Place cakes onto cake rack and allow to cool completely to room temperature.

While cake is baking make the buttercream frosting. In a large bowl, or stand mixer, whisk together butter. Slowly add confectioner’s sugar using mixer on low speed until frosting is smooth. Add heavy cream. Add vanilla extract. Add salt. Whisk frosting on medium-high speed until vanilla extract combined and frosting is light and fluffy.

Frost cakes once cooled with frosting. Decorate with Sprinkles and assorted candies.

Devour and Enjoy!