A few years ago, I was perusing one of my favorite online retailer’s end of the season clearance sale. It was during the fall which meant all the summer items that weren’t bought were significantly reduced in price. I just so happened to stumble upon these pants that I had my eye on for some time. These pants especially caught my eye because of their bell bottom shape, girly pink and purple colors with a unique international post card print. They were just my style, so I quickly put my correct size in my online shopping cart to purchase.
After I received the pants in the mail about a week later I was so ready to try them on. Being that I live in LA, I knew I could still get away with wearing them during our warm autumns or even save the pants for next summer season. I tried the pants on with great enthusiasm only to find out the pants were too small. The material had ZERO stretch and would not slide over my thick hips. The pants were not returnable to the store as a clearance item and I really liked them. I kept them determined to figure out how I could up-cycle them.
Fast forward to this year, I had already planned on attending the beach music festival called, Afro Nation, in July. I knew the pants would be perfect to wear to the festival with the right idea and upgrade. The concept for my new pants finally came to me after some creative clarity. I could take the pants and expand them by opening the seam and adding more material. Even better, I could add an intricate design with the right fabric accessories. I headed to Joann’s Fabrics before their final closing and got all the materials I needed for my project.
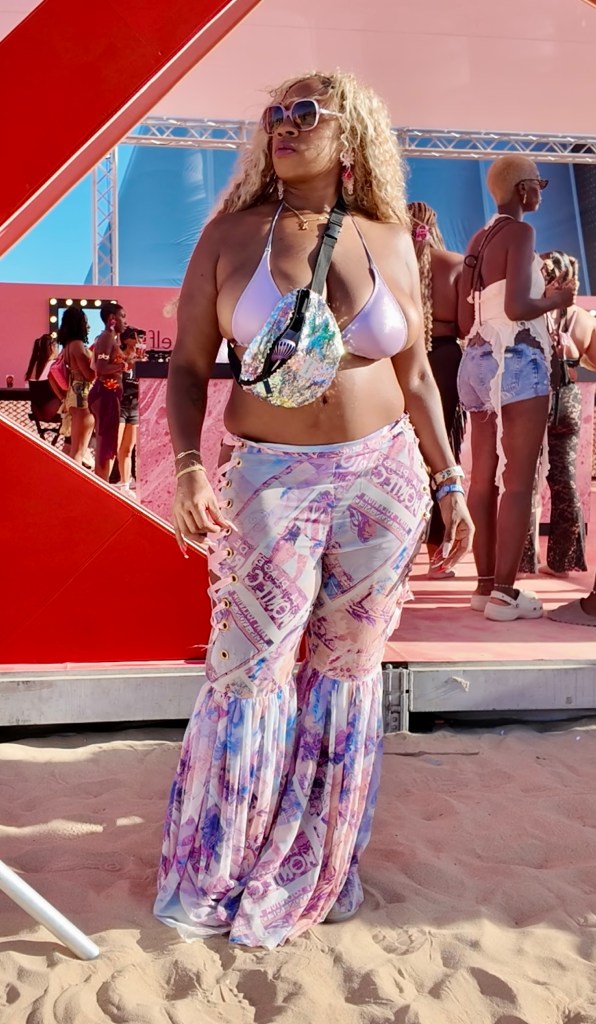
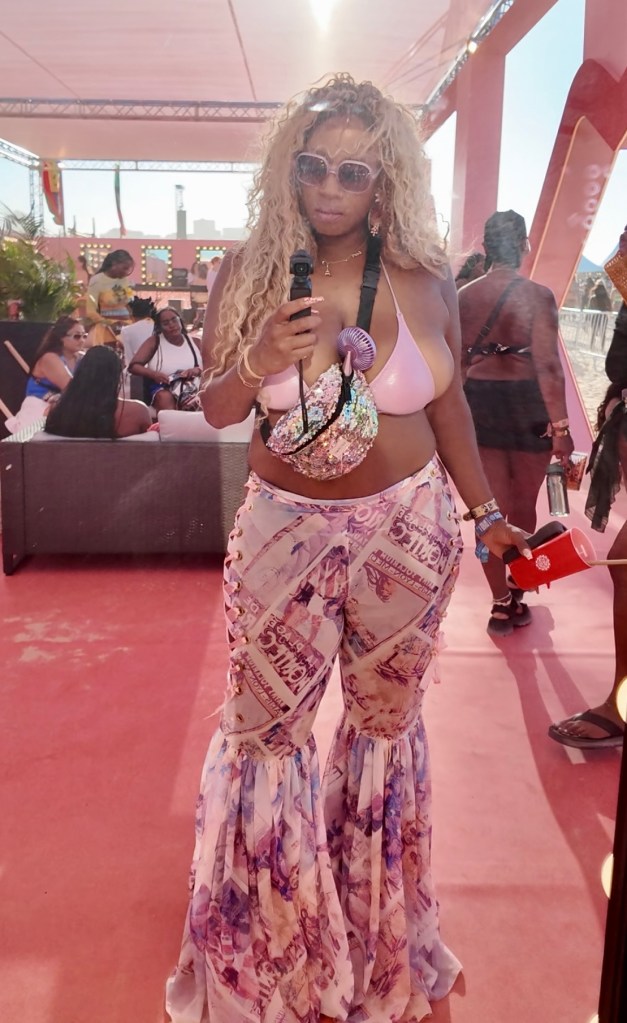
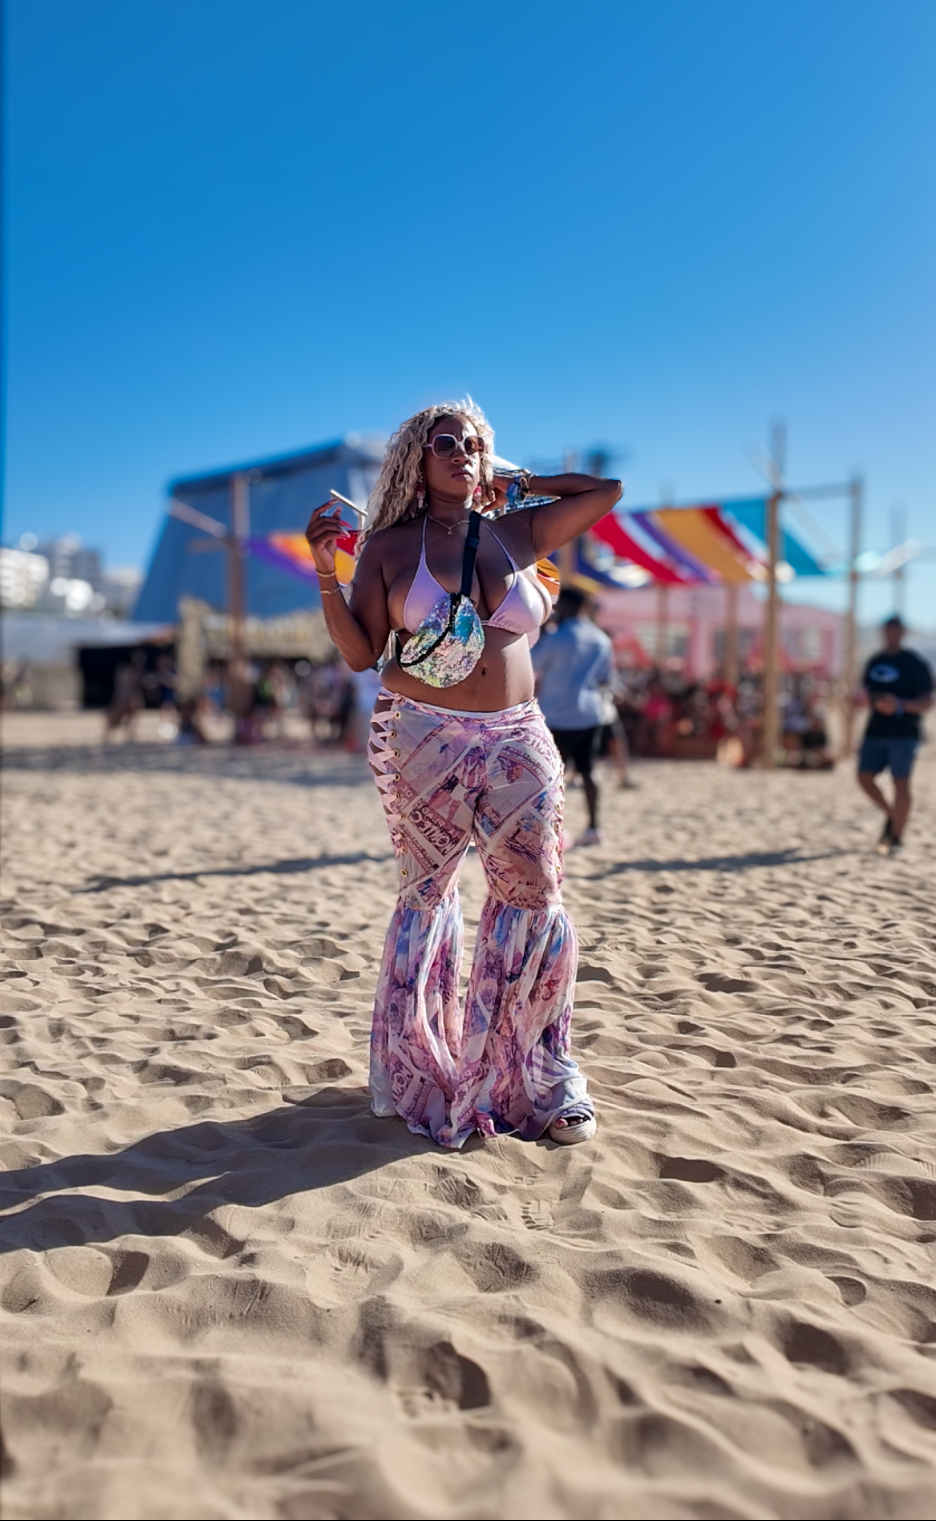
I was able to complete my Ribbon Corset Pants in a weekend. This DIY was pretty straight forward and easy to complete. I wore these pants on the first day of Afro Nation and received so many compliments on them. Here is what I did to finalize these DIY: Ribbon Corset Pants.
Materials
-Seam ripper
-Fabric scissors
-Iron on hem tape
-Ribbon (I used 7/8″ thick, 21ft/ 6.4m long)
-Grommets
-Grommet kit
-Hammer
-Fabric pen/ marker
-Iron
-Tape measurer
-Push pins
*-¾” to 1″ thick elastic
– needle & thread
Directions
- After purchasing pants you plan to upgrade you need to remove the outseam from both pant legs using your seam ripper. Remove seam half way down the leg until you get to the knee.
- Once outseam has been removed from both pant legs you’re going to have to replace the hem on the sides. Use push pins to secure hem tape to raw edges. Use iron to adhere hem tape to your pant sides. Then remove push pins.
- Now using your fabric maker and measuring tape, mark down the outseam where you want to place your grommets. Make sure grommets start at top of waistline.
- Place grommet over marked spots on outseam and use grommet kit and hammer to secure grommet to the fabric. Repeat steps until all grommet spots have been completed. (If the fabric is too thick to secure grommet properly, pre cut a hold over mark on fabric to help grommet process.)
- Once all grommets are in place, add ribbon to each side of outer pant leg in design pattern of your choice. Adjust ribbon on each side and tie in place to your fitting.
Ta-da!! Just like that you have fabulous one-of-a-kind Ribbon Corset Pants to wear to your liking.
* After wearing my pants to Afro Nation I realized that a more secure waistline is essential to keeping the pants on. This can easily be fixed by sewing on elastic to the top waistline of the outseam. All you need to do is measure the length of elastic needed for each side. Cut elastic to proper size and secure in place with pins. Sew (either hand sew or use a machine) to attach elastic to pants. Once in place, restring side of pants with ribbon.