
Original post date: October 28th, 2013
This Fall, elaborate and ornate sweatshirts are trending. Whether its bedazzled or there is huge embroidered kitty on the front, a sweatshirt can make your outfit. This type of clothing, that used to be reserved for a super casual relaxed looked has now been jazzed up so that it can now be considered a more dressy statement. These designer sweatshirts can costs hundreds of dollars. I refuse to pay that much for something you can easily make yourself and also make more GLAMOROUS!! I saw an inspirational pic. on Pinterest and I got to work. Here is what I did


Materials needed
1. Sweatshirt, I purchased mine from the mens section of Target for $7.49
2. Two yards of ribbon, width of your choice. (I would not go any small than a 3/4 inch)
3. 1/8 yard of silky fabric (Mine is a polyester blend)
4. Fabric glue
5. Fabric scissors
6. Hem iron on adhesive tape. I purchased mines from Joann Fabrics
7. Cloth/ fabric pen
8. Measuring tape
9. Iron
Instructions
Using your fabric scissors, cut off collar of sweatshirt. Turn sweatshirt inside out. Have back of sweatshirt facing you. Draw horizontal line from armpit to armpit. Measure center of line. Mark center of line. (this will be the apex of your back). Fold your sweatshirt length wise, making sure the center mark is visible and all the seams line up on each side of sweatshirt. Cut from Top arm seam to the apex mark. Unfold your shirt. (You should now have a low v-shaped cut in the back of your sweatshirt.) Clean up the edges, using your scissors, making sure the sides are as symmetrical as they can be. Set aside
Take your piece of fabric, hold it in half, the cut the ends at an approximate 45 degree angle. Unfold fabric. Fold and iron down a 1/4 inch hem around all the edges. Once hem is ironed, place adhesive tape under the hem line and iron tape in place.
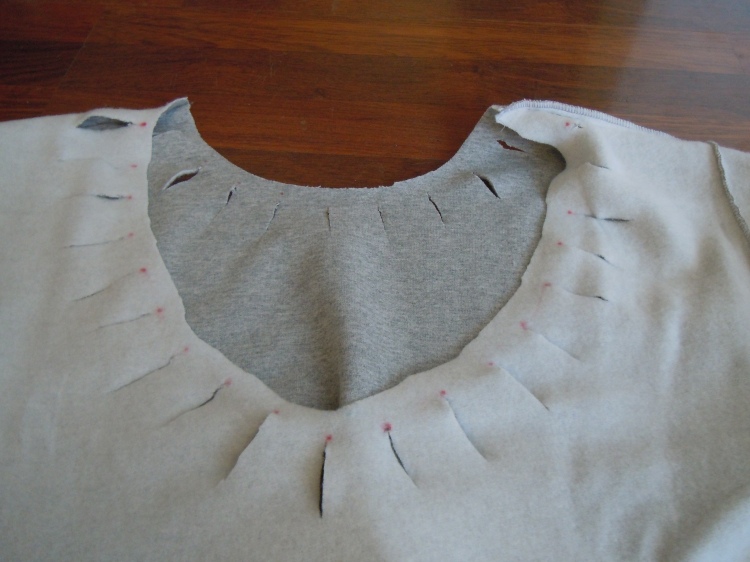
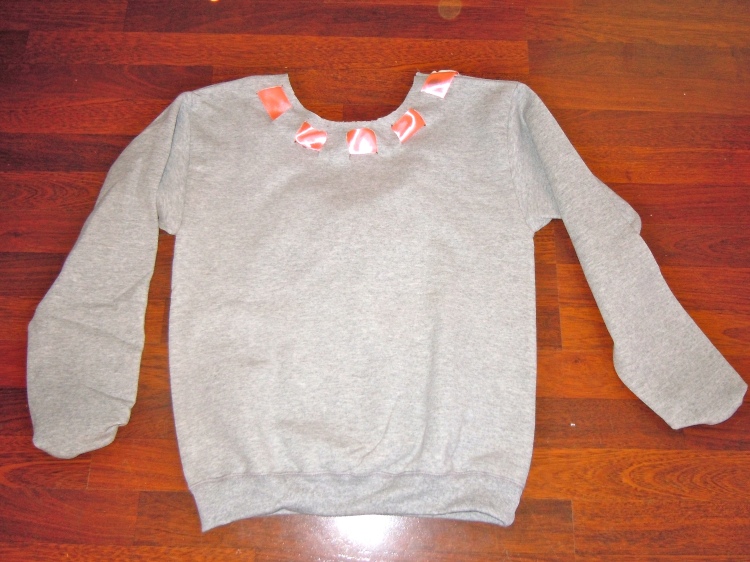
Using your fabric pen and measuring tape, measure out 1.25 inch lines around the entire collar of your sweatshirt. (Make sure to leave about a 0.5 inch space between the collar and your mark). Once all your lines have been marked, cut lines the width of your ribbon on all the places you made marks around the collar. (Once again, make sure your cut lines do NOT intersect with the actual collar point). Once all lines have been cut, take your ribbon and basket weave it through your cut lines. Make sure the beginning and ending of your ribbon are at the apex of your back collar. Take your fabric glue and glue your ribbon in place. Trim off excess ribbon. Turn sweatshirt right side out. Take 3 inches of your excess ribbon and glue the ends together, (this will serve as the middle of your bow). Once ribbon has dried, slide ribbon piece over fabric and place it in the center of the fabric. Glue ribbon piece to the apex of back of the sweatshirt. Fold one side the fabric over, so it resembles a bow. Glue the side of fabric to the back of the sweatshirt. Repeat this on the other side of the piece of fabric. Now glue the hanging fabric pieces by the apex of the collar so that they are able to stay in place but are still free flowing. Allow sweatshirt and glue to dry over night.
You now have a FABULOUS, super trendy sweatshirt that it is super chic!!

One thought on “DIY No sew: Swank Sweatshirt”